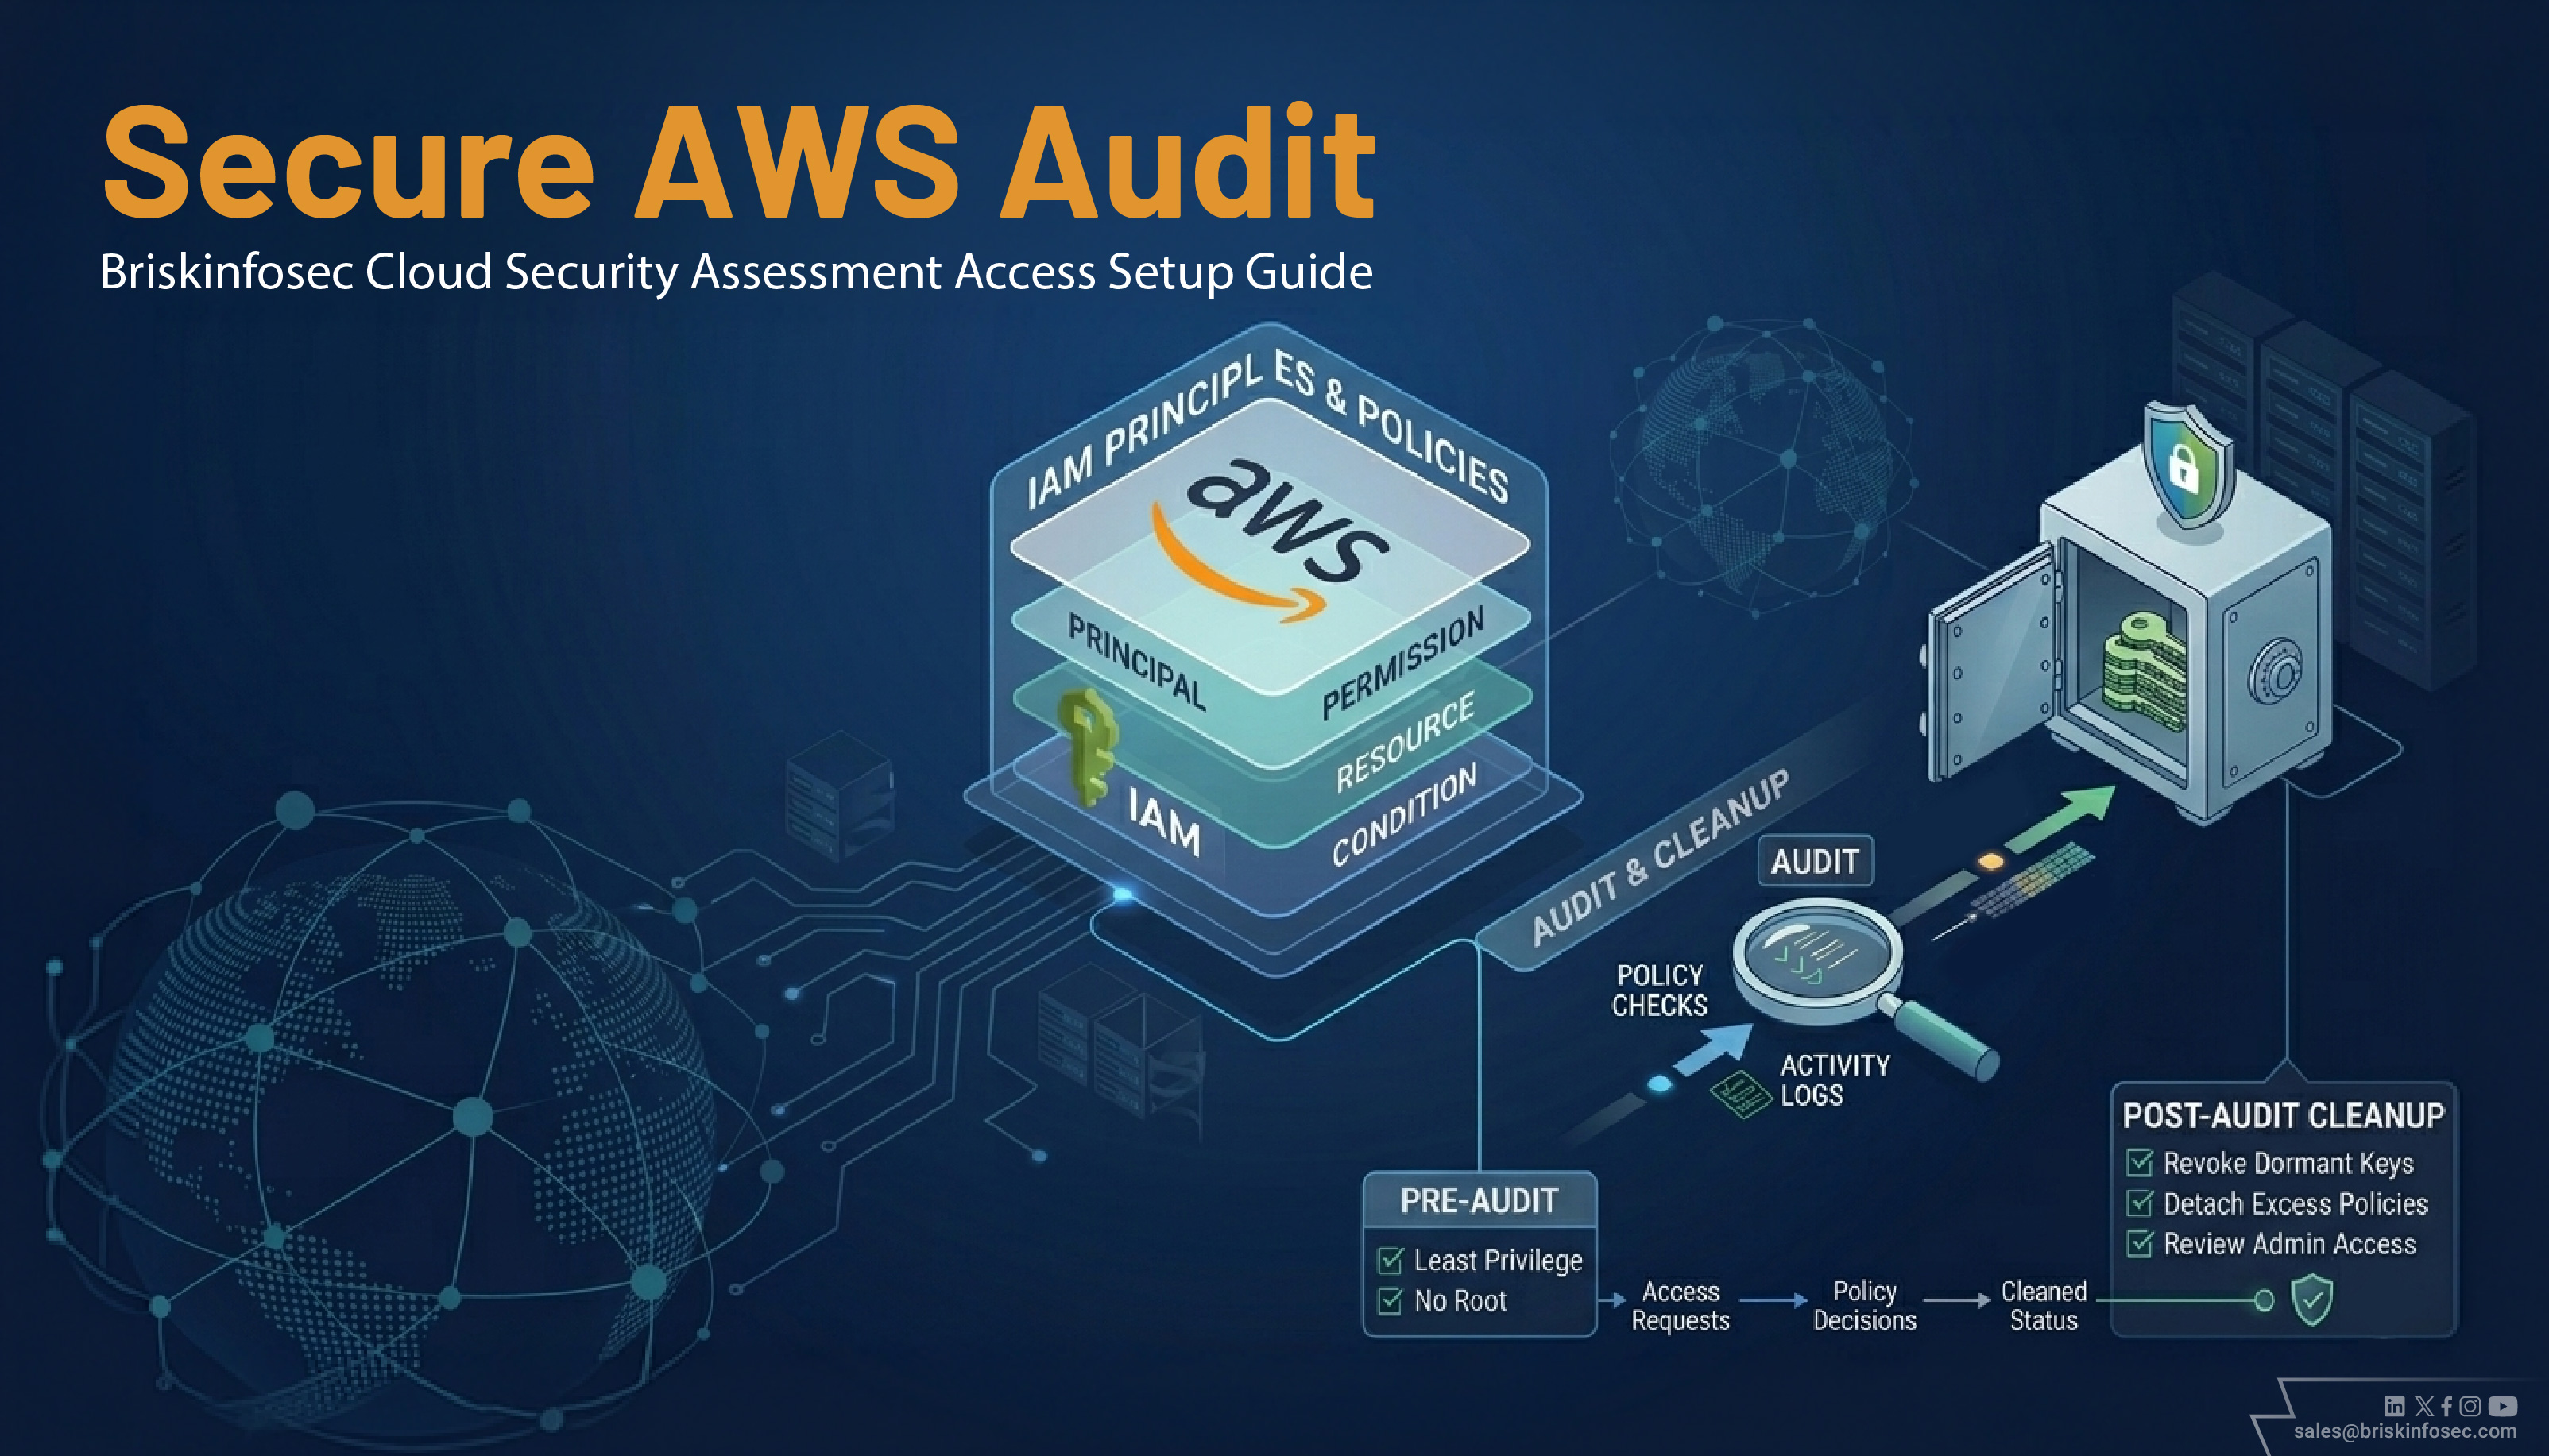
Briskinfosec Cloud Assessment Access Setup Guide
Organizations commissioning cloud security assessments have a fundamental responsibility: granting external auditors just enough visibility to do their job and nothing more. Sharing root credentials, handing over administrator accounts, or reusing existing operational IAM users introduces unnecessary risk, breaks audit traceability, and violates the principle of least privilege.
This step-by-step guide walks you through creating a dedicated, read-only AWS IAM user for Briskinfosec cloud configuration reviews and security audits. Every instruction here reflects real-world enterprise security standards, ensuring your environment stays safe while giving our team the access they need to deliver accurate and comprehensive findings.
Why You Need a Dedicated IAM Audit User
The temptation to reuse an existing account is understandable as it saves time. But from a security standpoint, it creates several problems that are difficult to undo after the fact.
Avoid sharing any of the following:
1. No Root account credentials
2. No Administrator or power-user accounts
3. No Existing operational IAM users with production permissions
A purpose-built audit IAM user delivers clear security benefits:
1. Activity traceability: every API call is logged under the audit user, making it easy to review exactly what was accessed.
2. Temporary access management: the account exists only for the duration of the audit.
3. Granular permission control: only the policies required for reading configuration data are attached.
4. Easy revocation: deleting or disabling the user immediately terminates all access.
5. Compliance alignment: satisfies audit trail requirements under SOC 2, ISO 27001, PCI DSS, and similar frameworks.
Recommended AWS Policies for Security Audits
Briskinfosec requires two AWS-managed policies to perform a thorough cloud configuration review. Together, they provide comprehensive read-only coverage without any modification permissions.
| Policy | Purpose and Scope |
| SecurityAudit | Security-focused visibility that evaluates IAM configurations, CloudTrail settings, S3 bucket policies, security group rules, and compliance posture. |
| ReadOnlyAccess | Broader infrastructure read visibility covering EC2, RDS, Lambda, VPC, and dozens of additional services for complete environmental mapping. |
Neither policy permits any write, delete, or modification operations. Your infrastructure is fully protected throughout the engagement.
Step-by-Step: Creating the IAM Audit User
Follow these 14 steps in sequence. The entire process takes approximately 10 minutes.
Watch our step-by-step video guide here
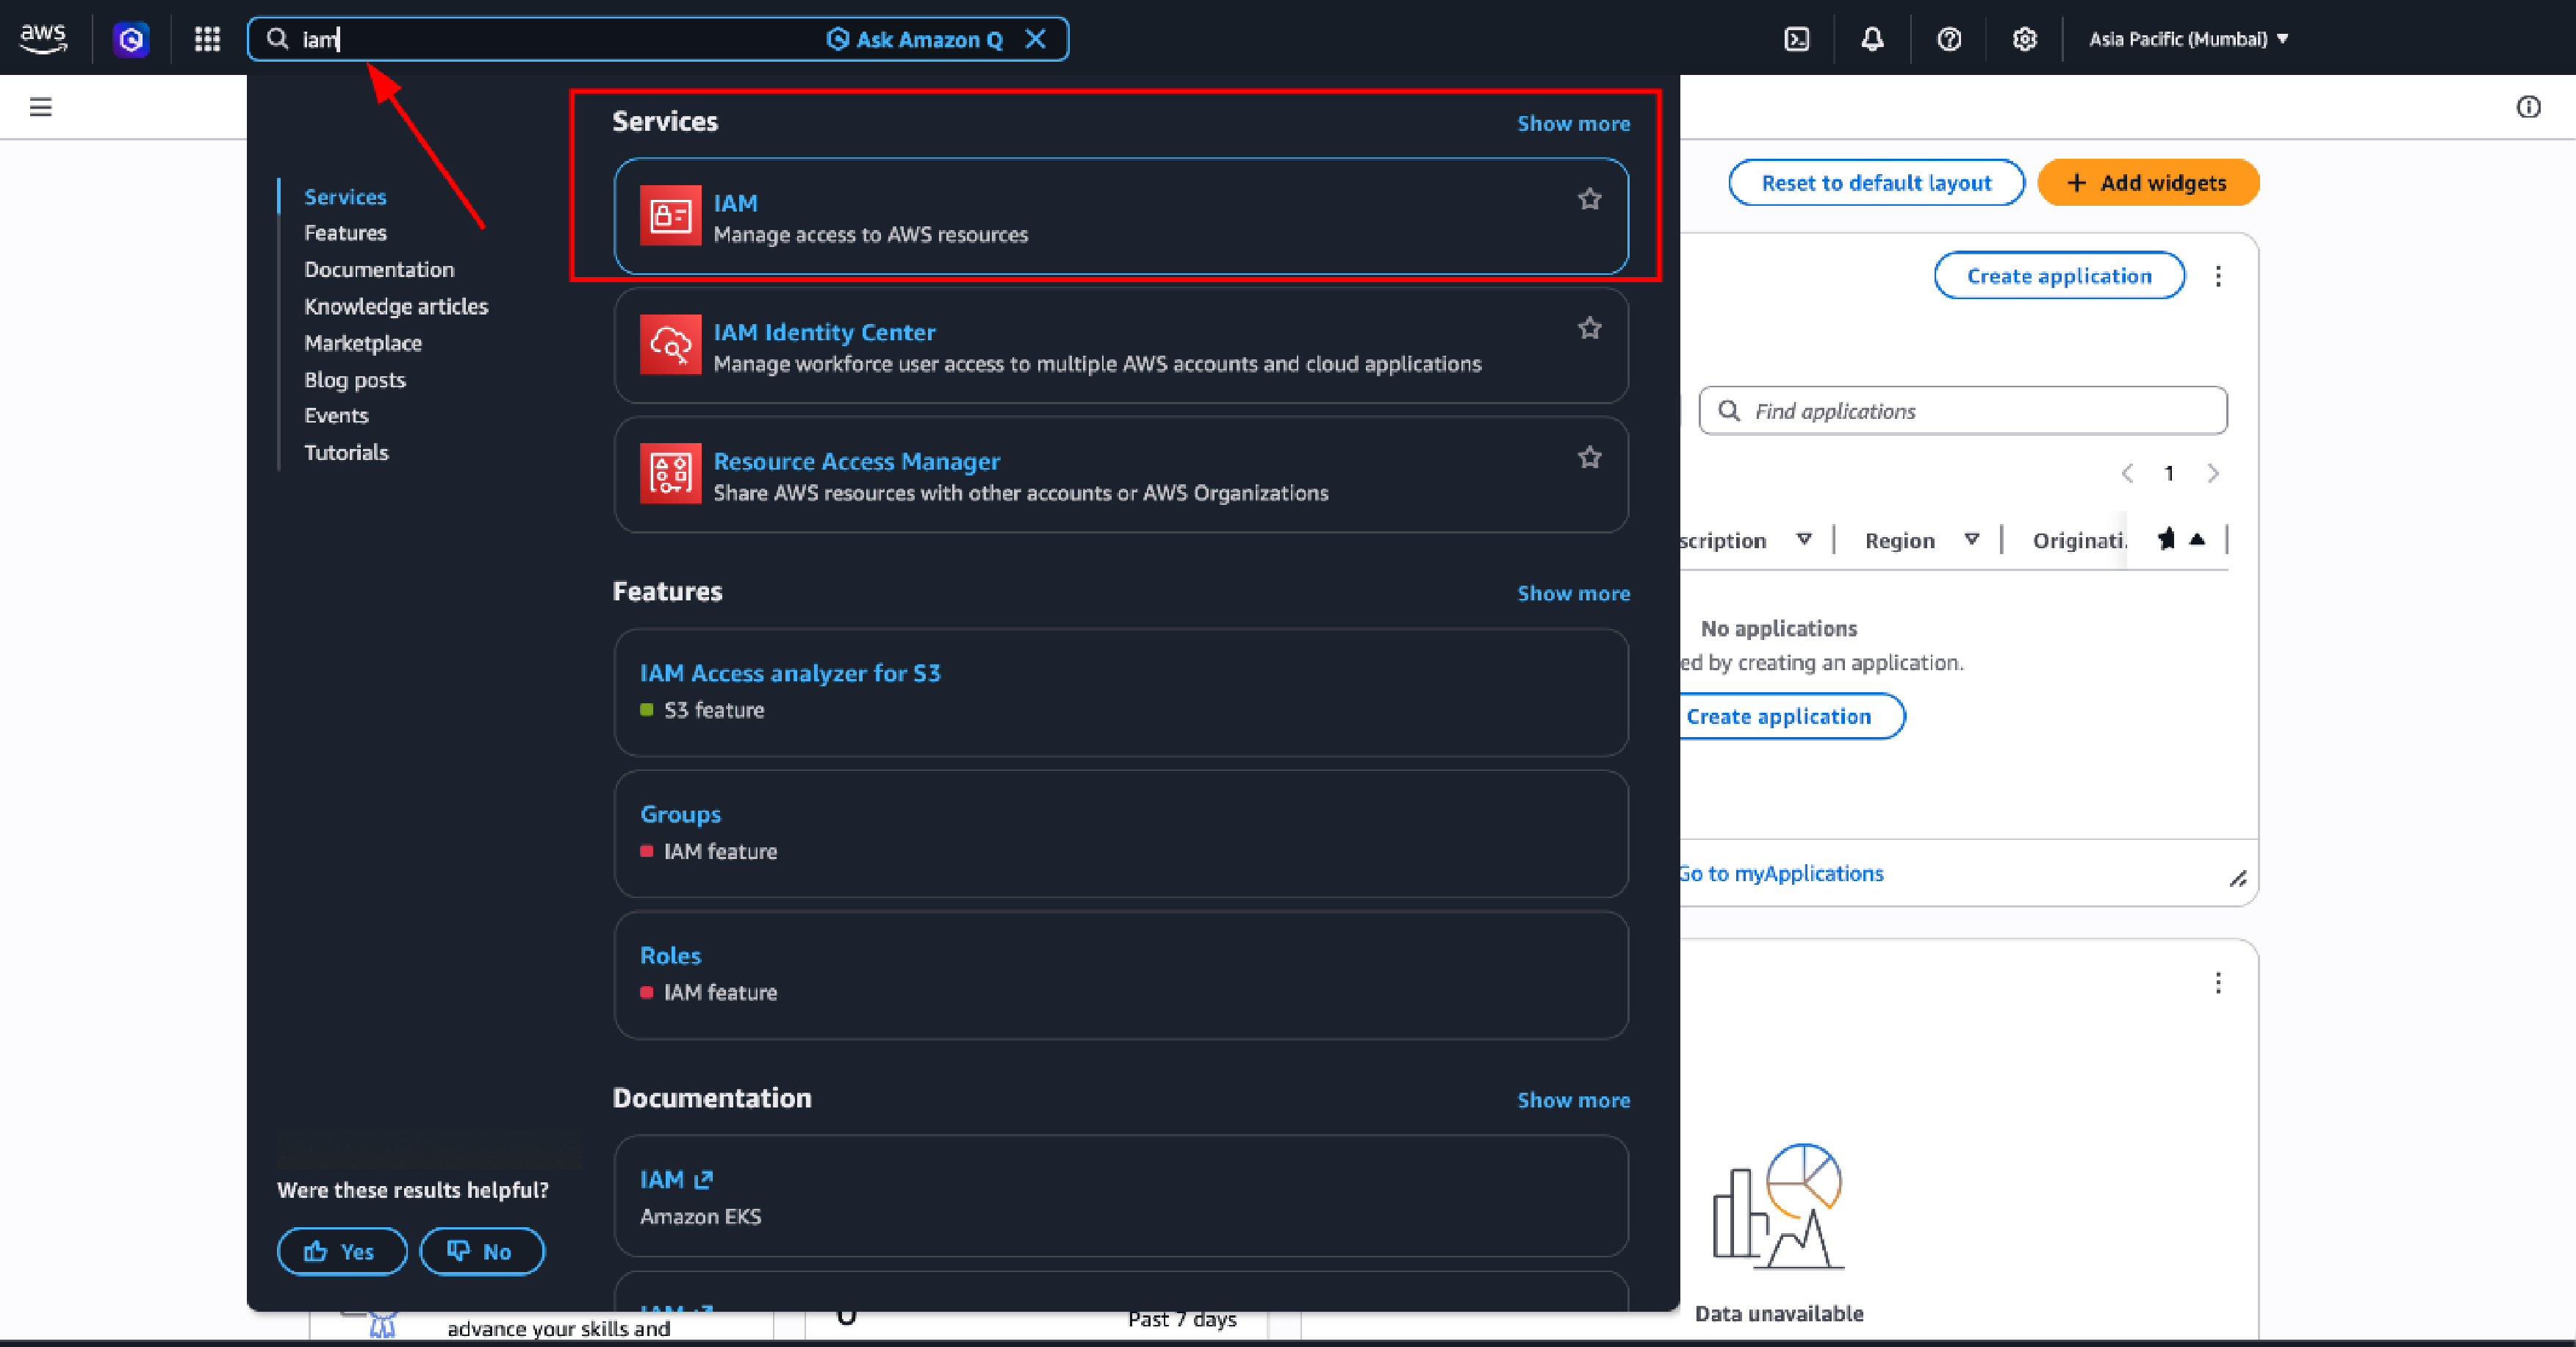
Step 1 — Open AWS IAM Service
Log in to the AWS Management Console and navigate to the IAM service. In the top search bar, type IAM and click the result to open the Identity and Access Management dashboard.
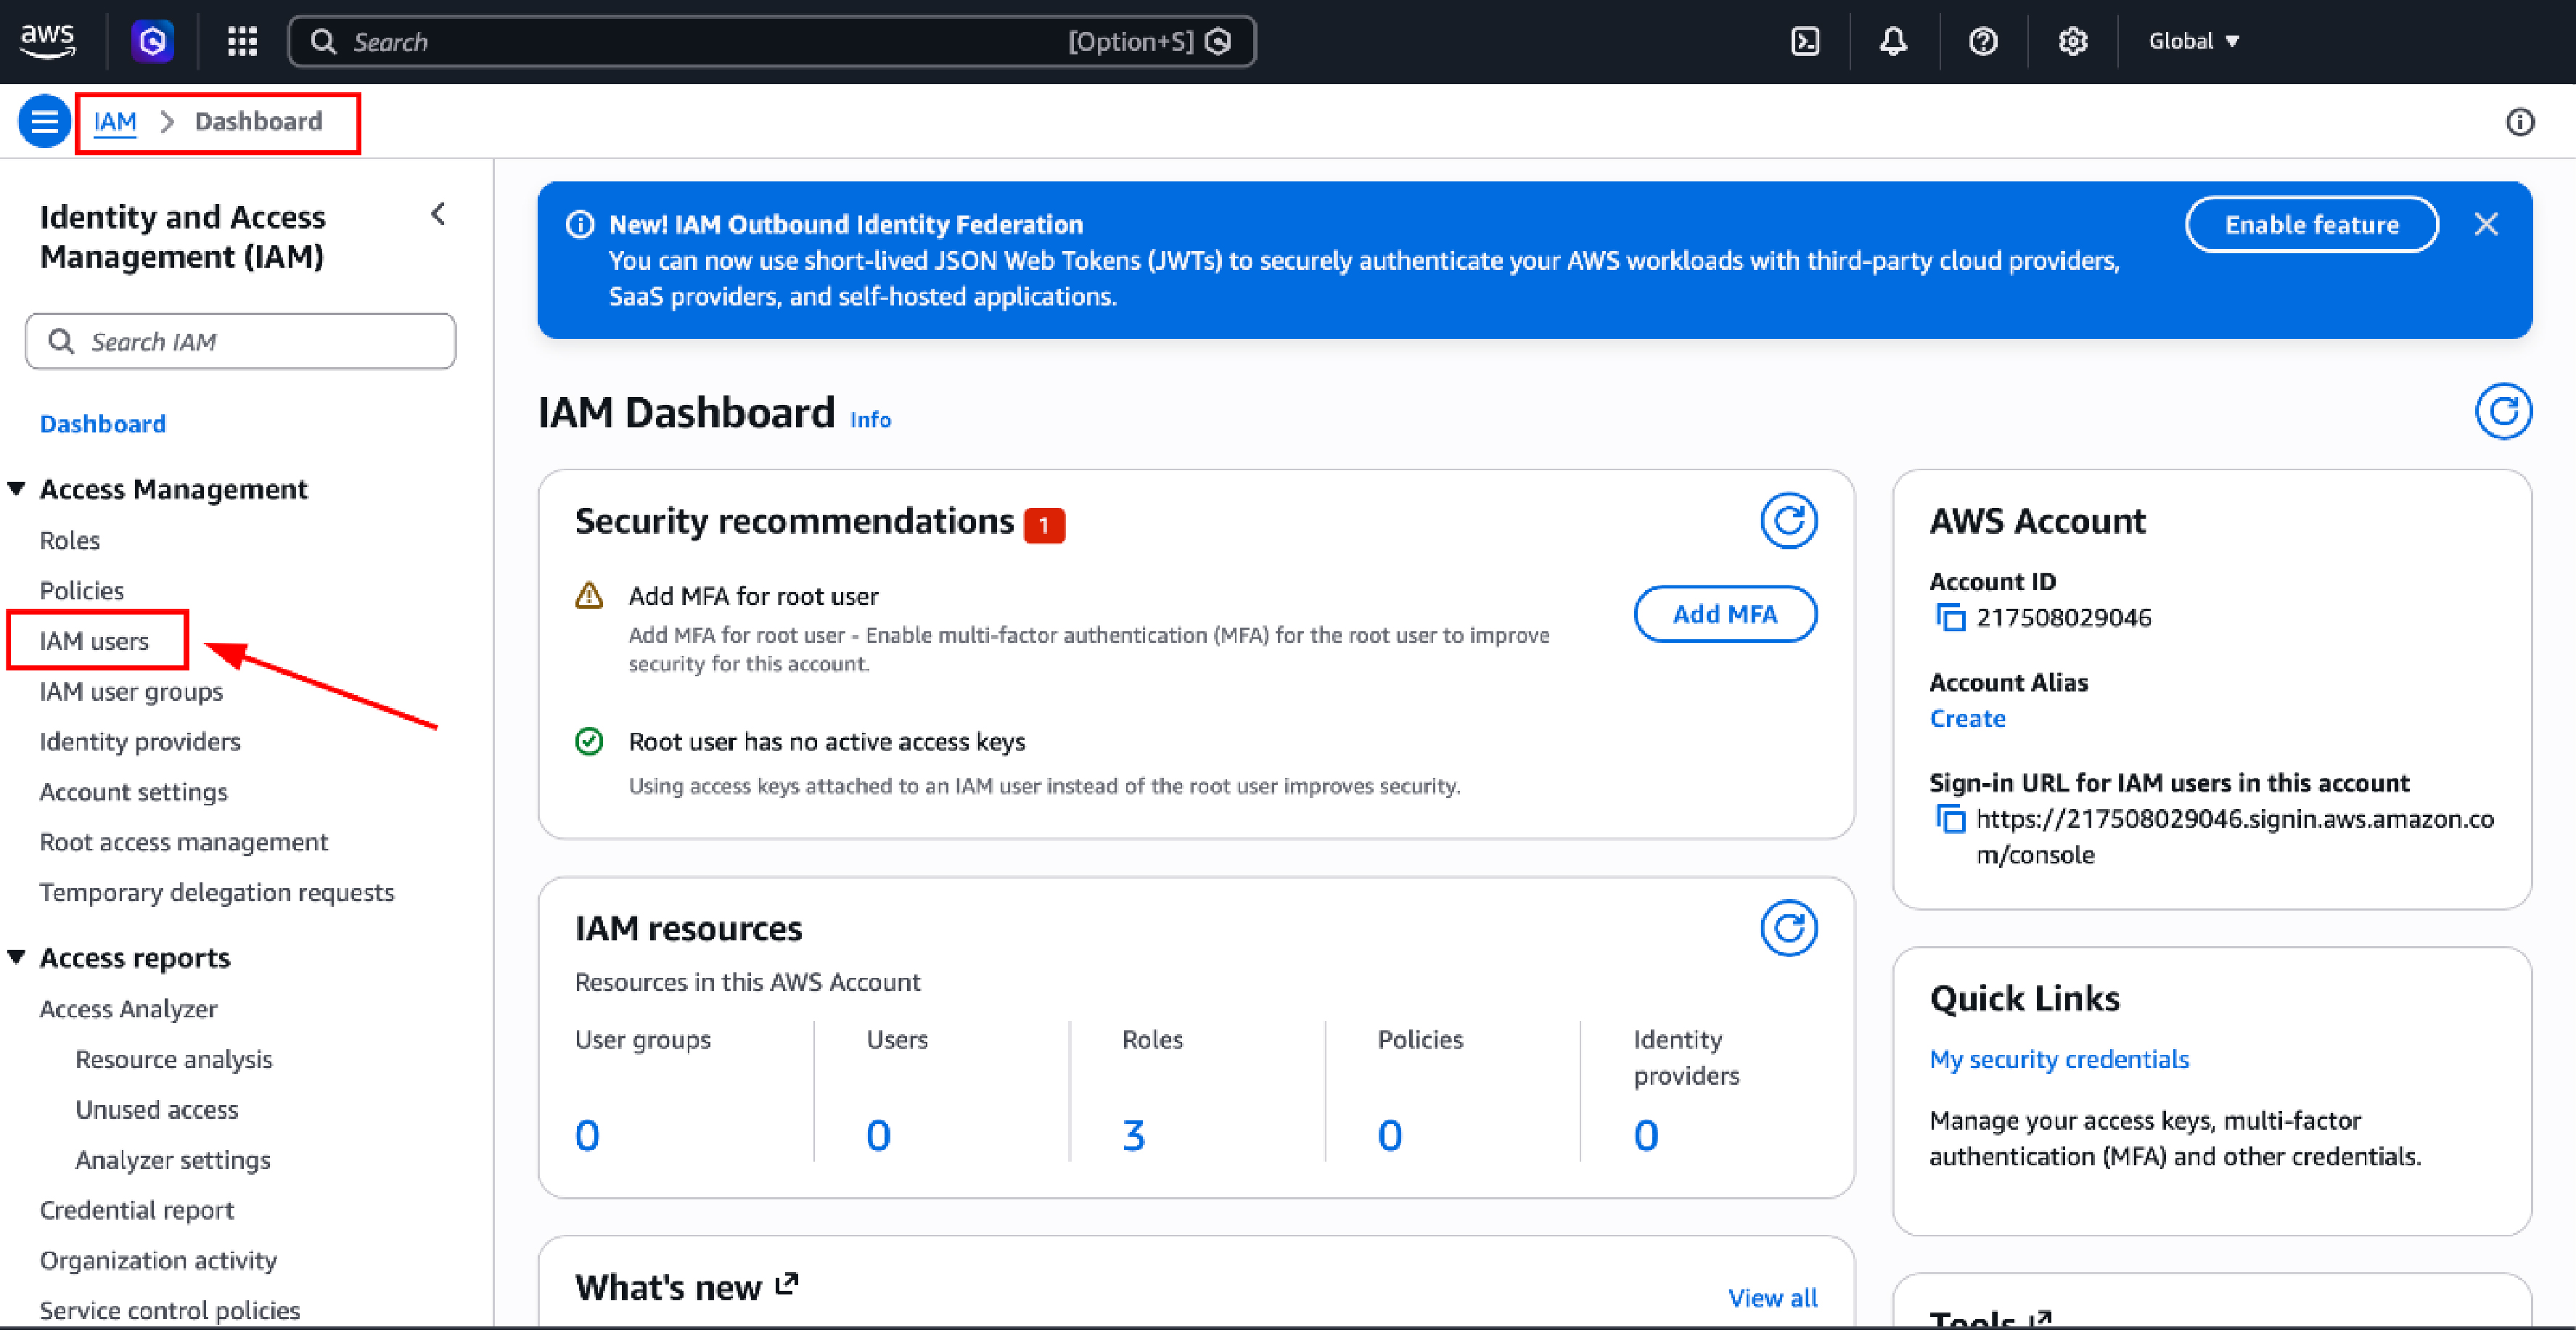
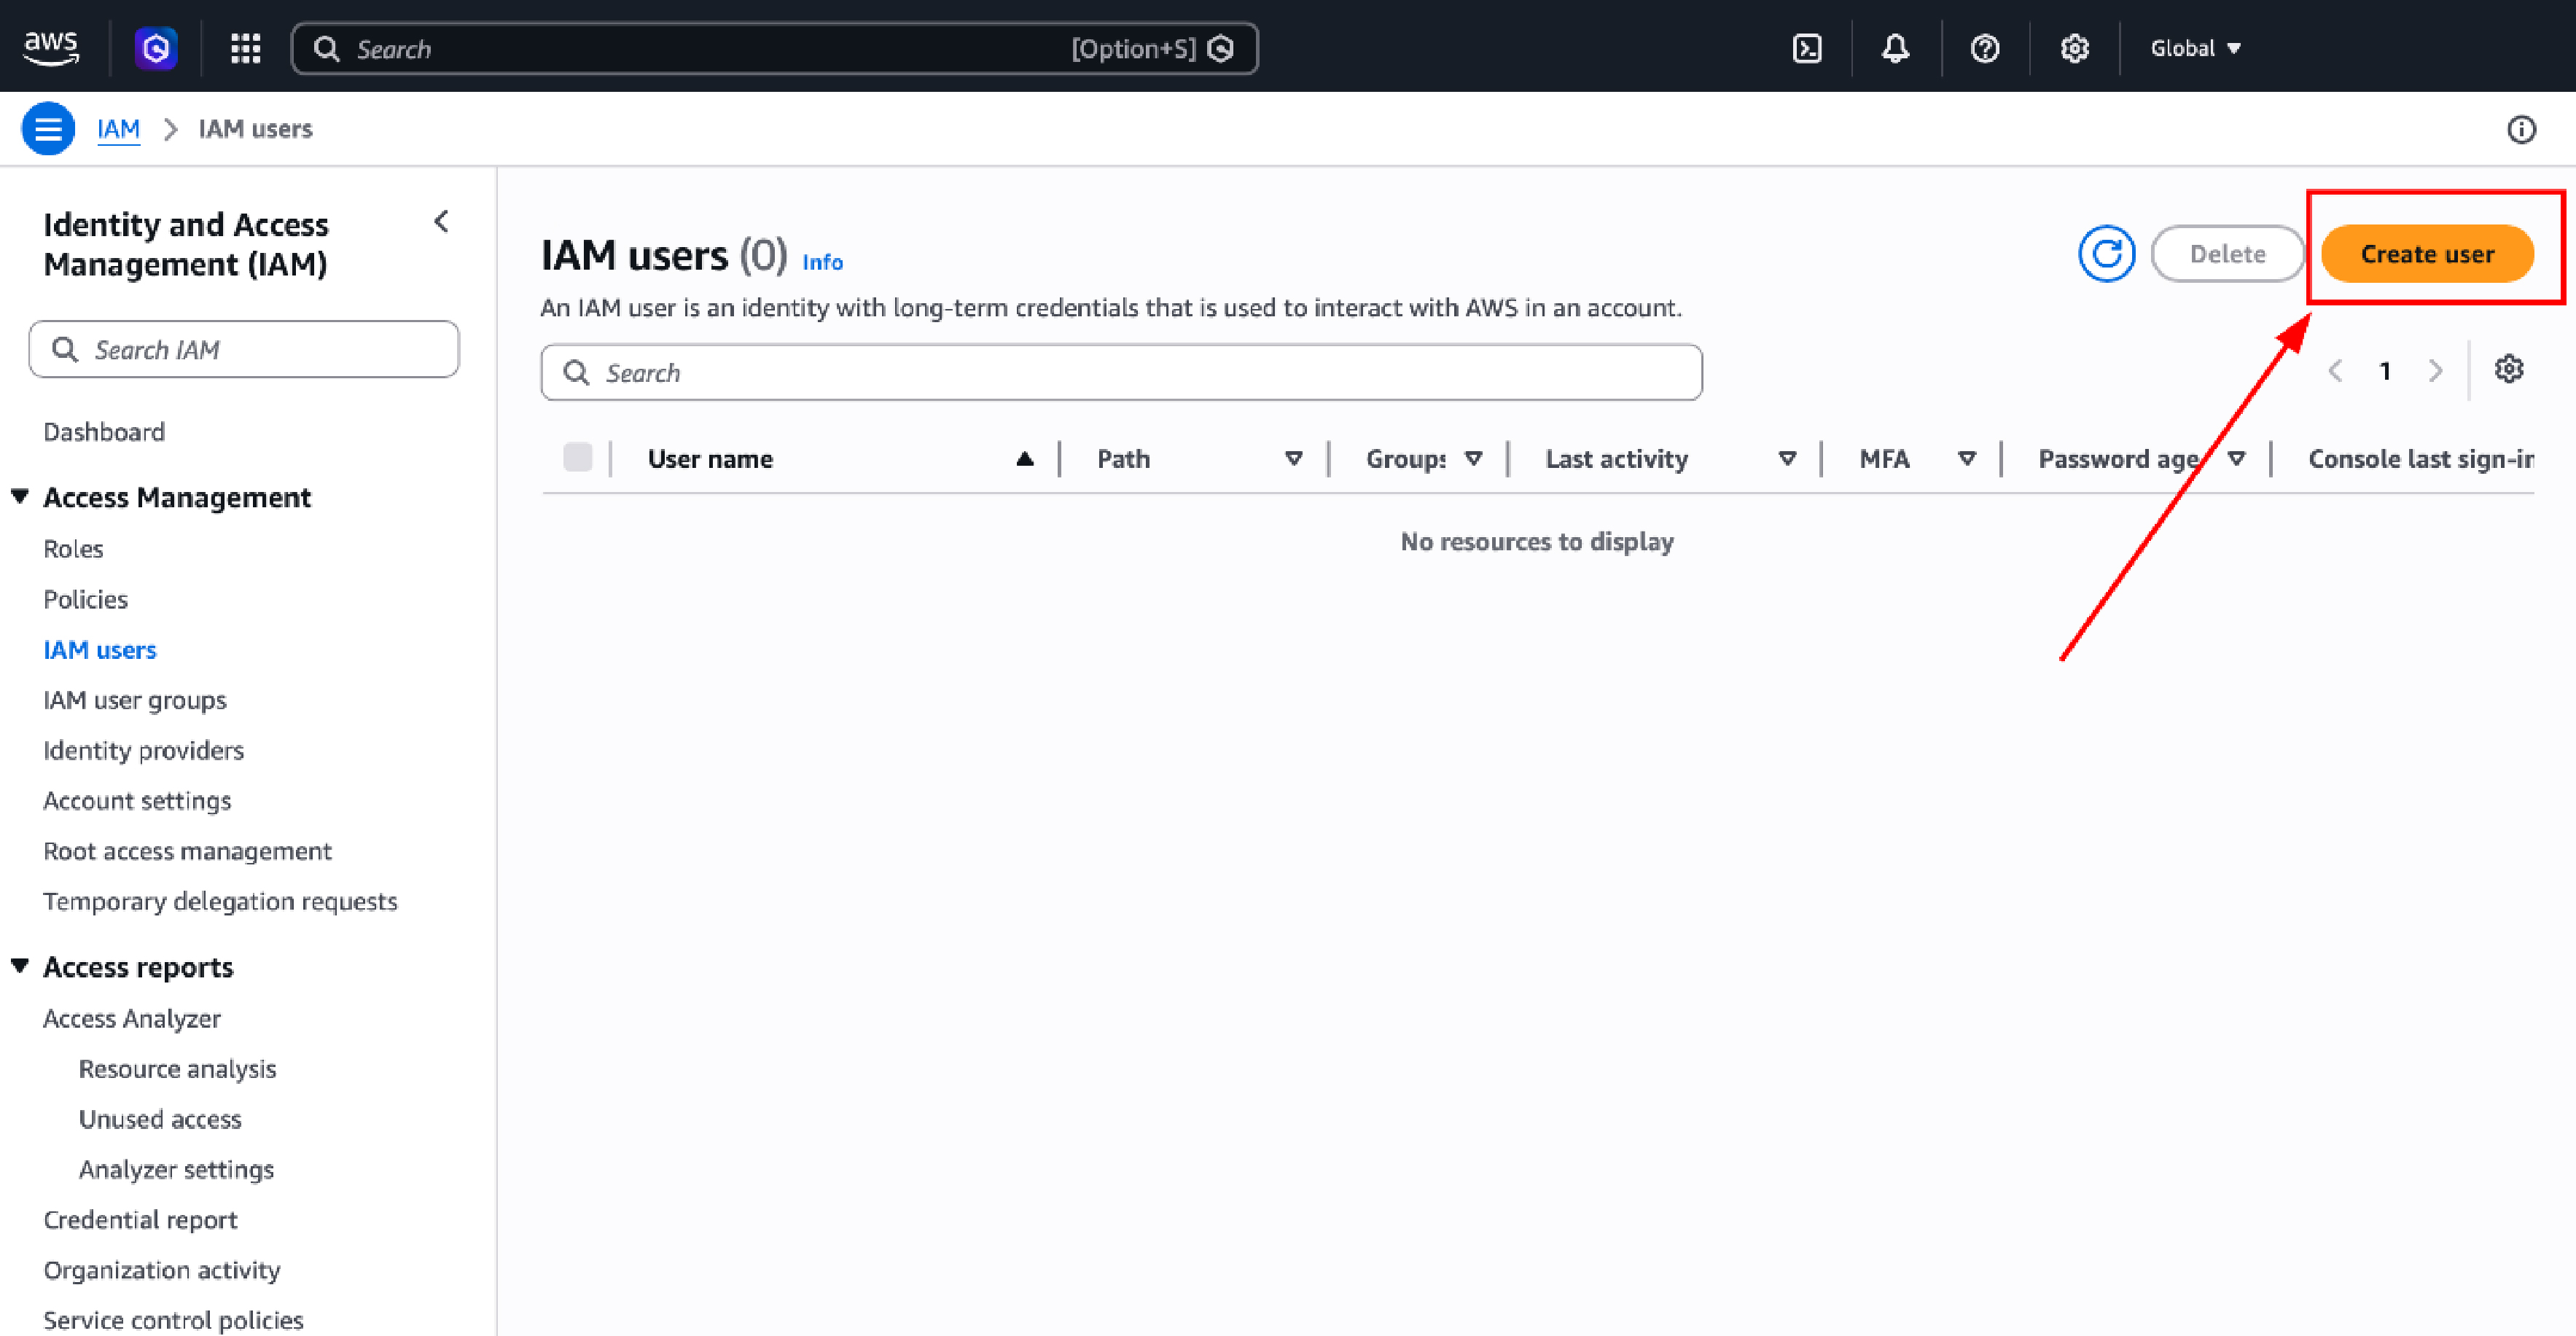
Step 2 — Open the IAM Users Section
In the left-hand navigation panel, click Users. This section lists all IAM users currently configured within the AWS account.
Step 3 — Initiate User Creation
Click the orange Create user button. This launches the user creation wizard.
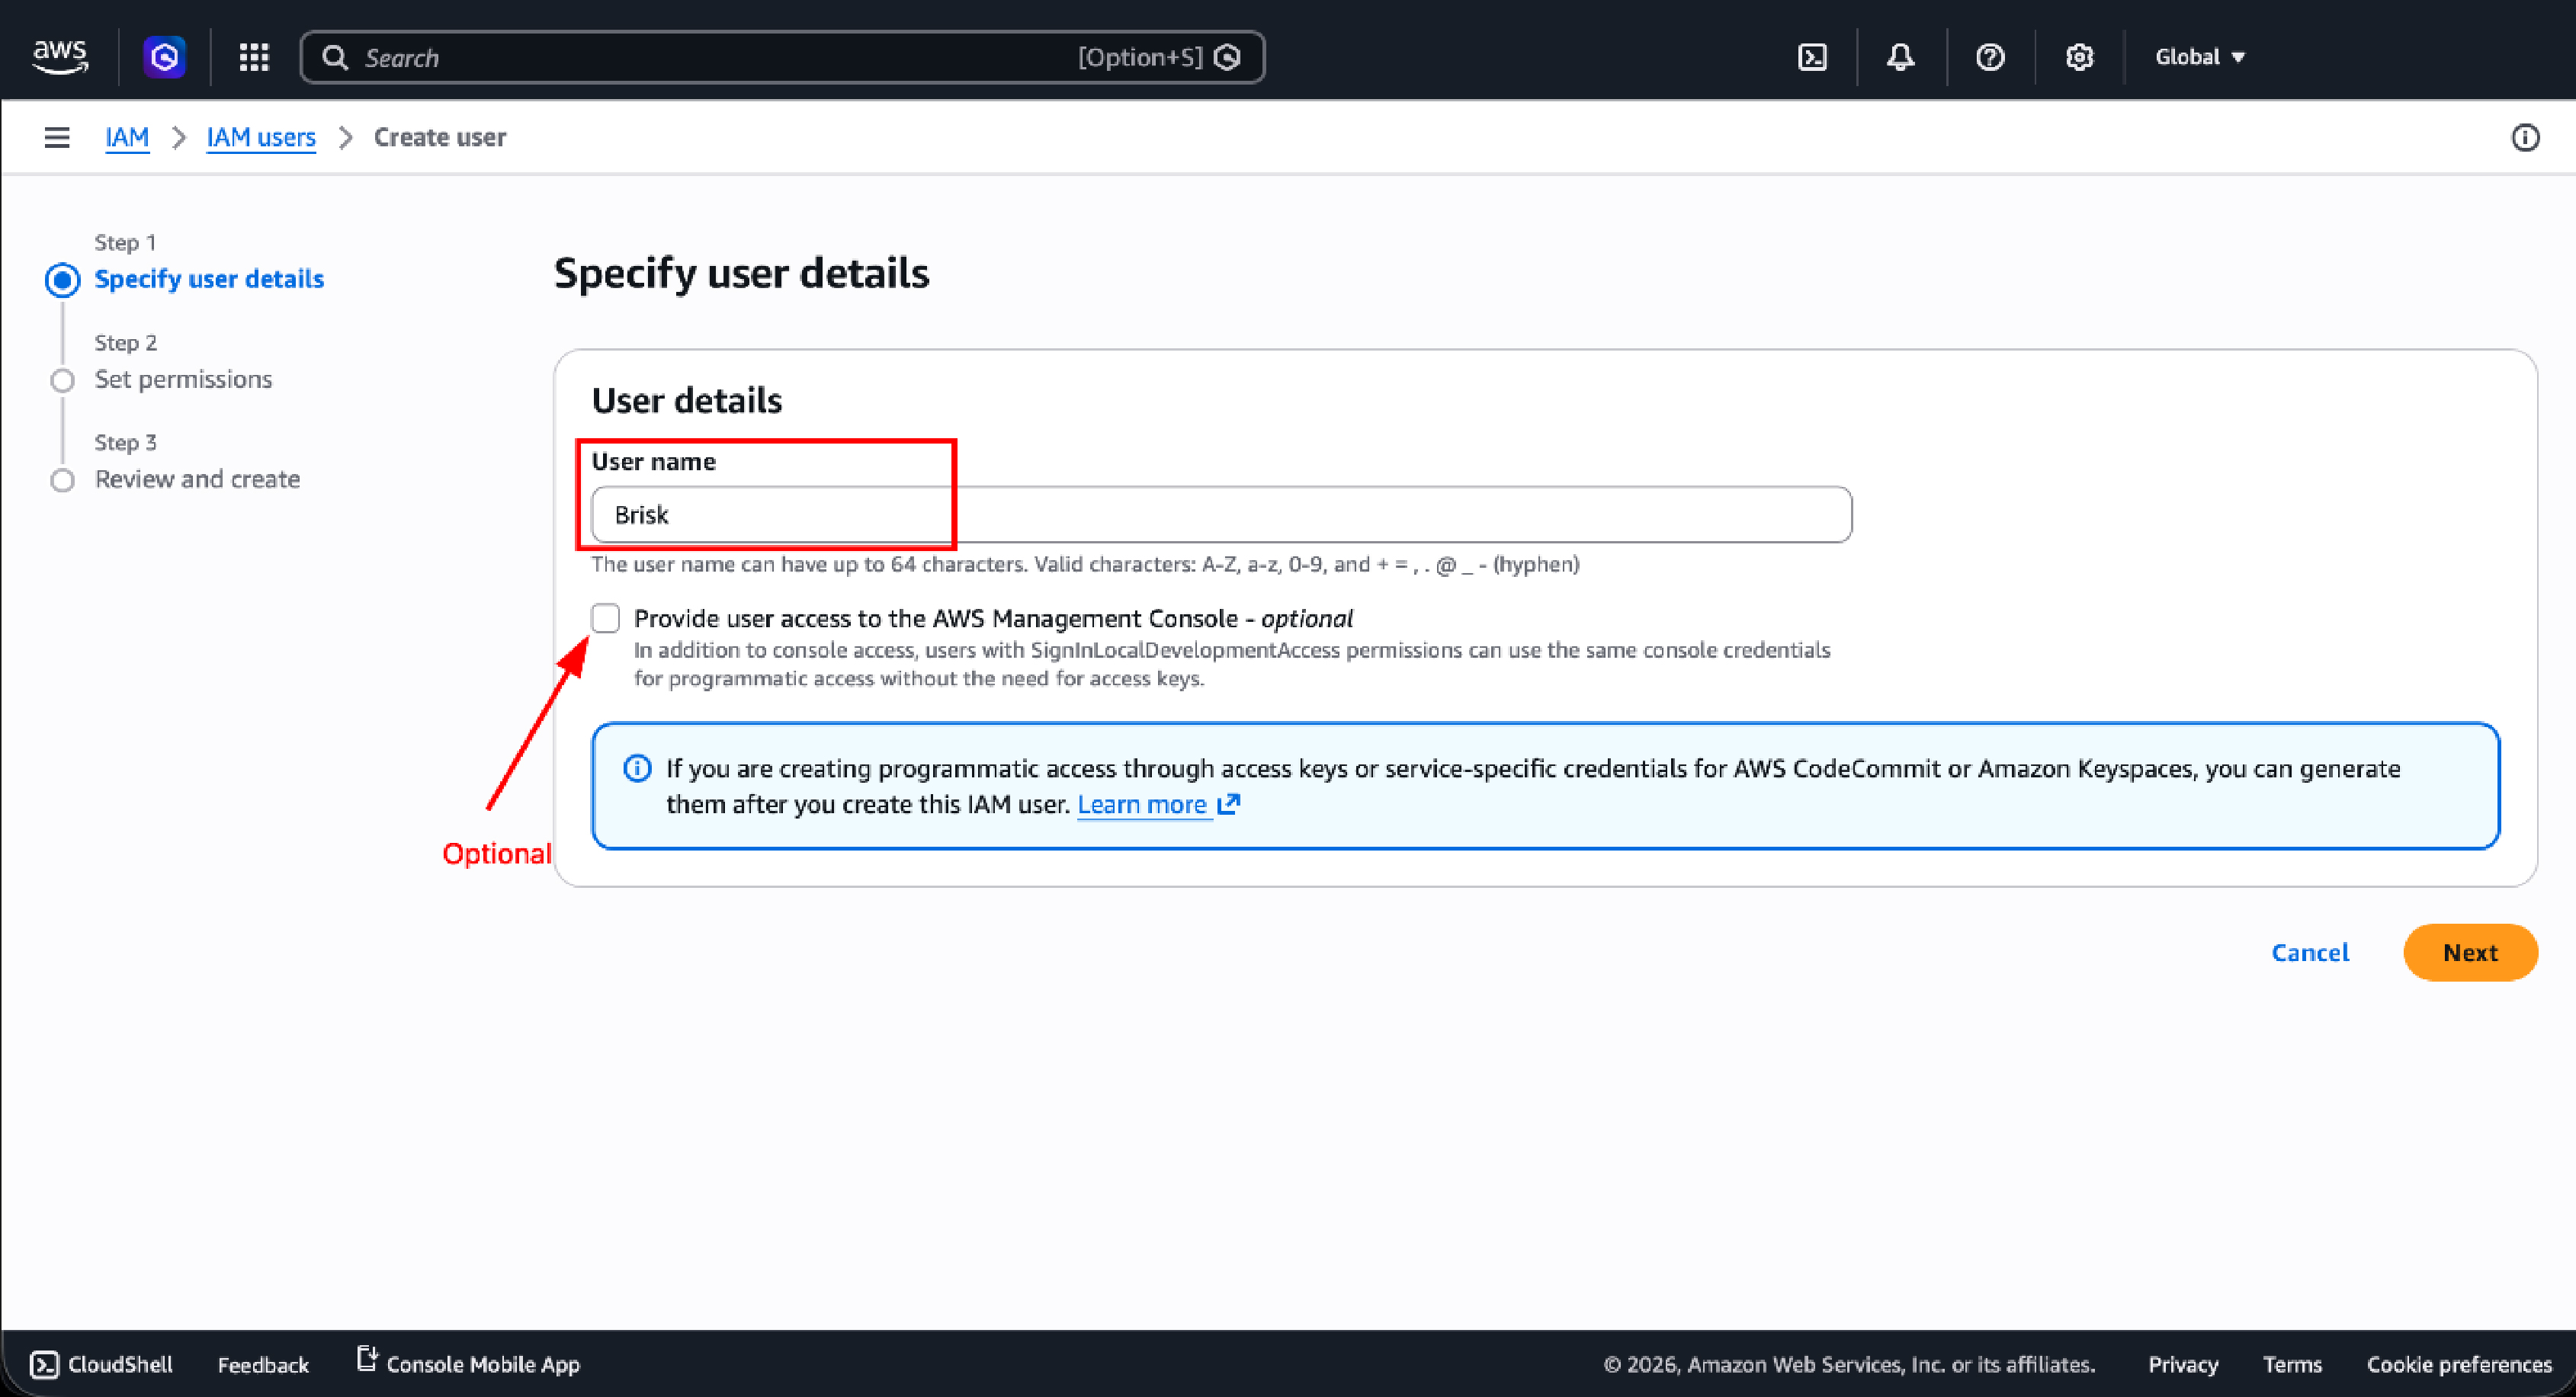
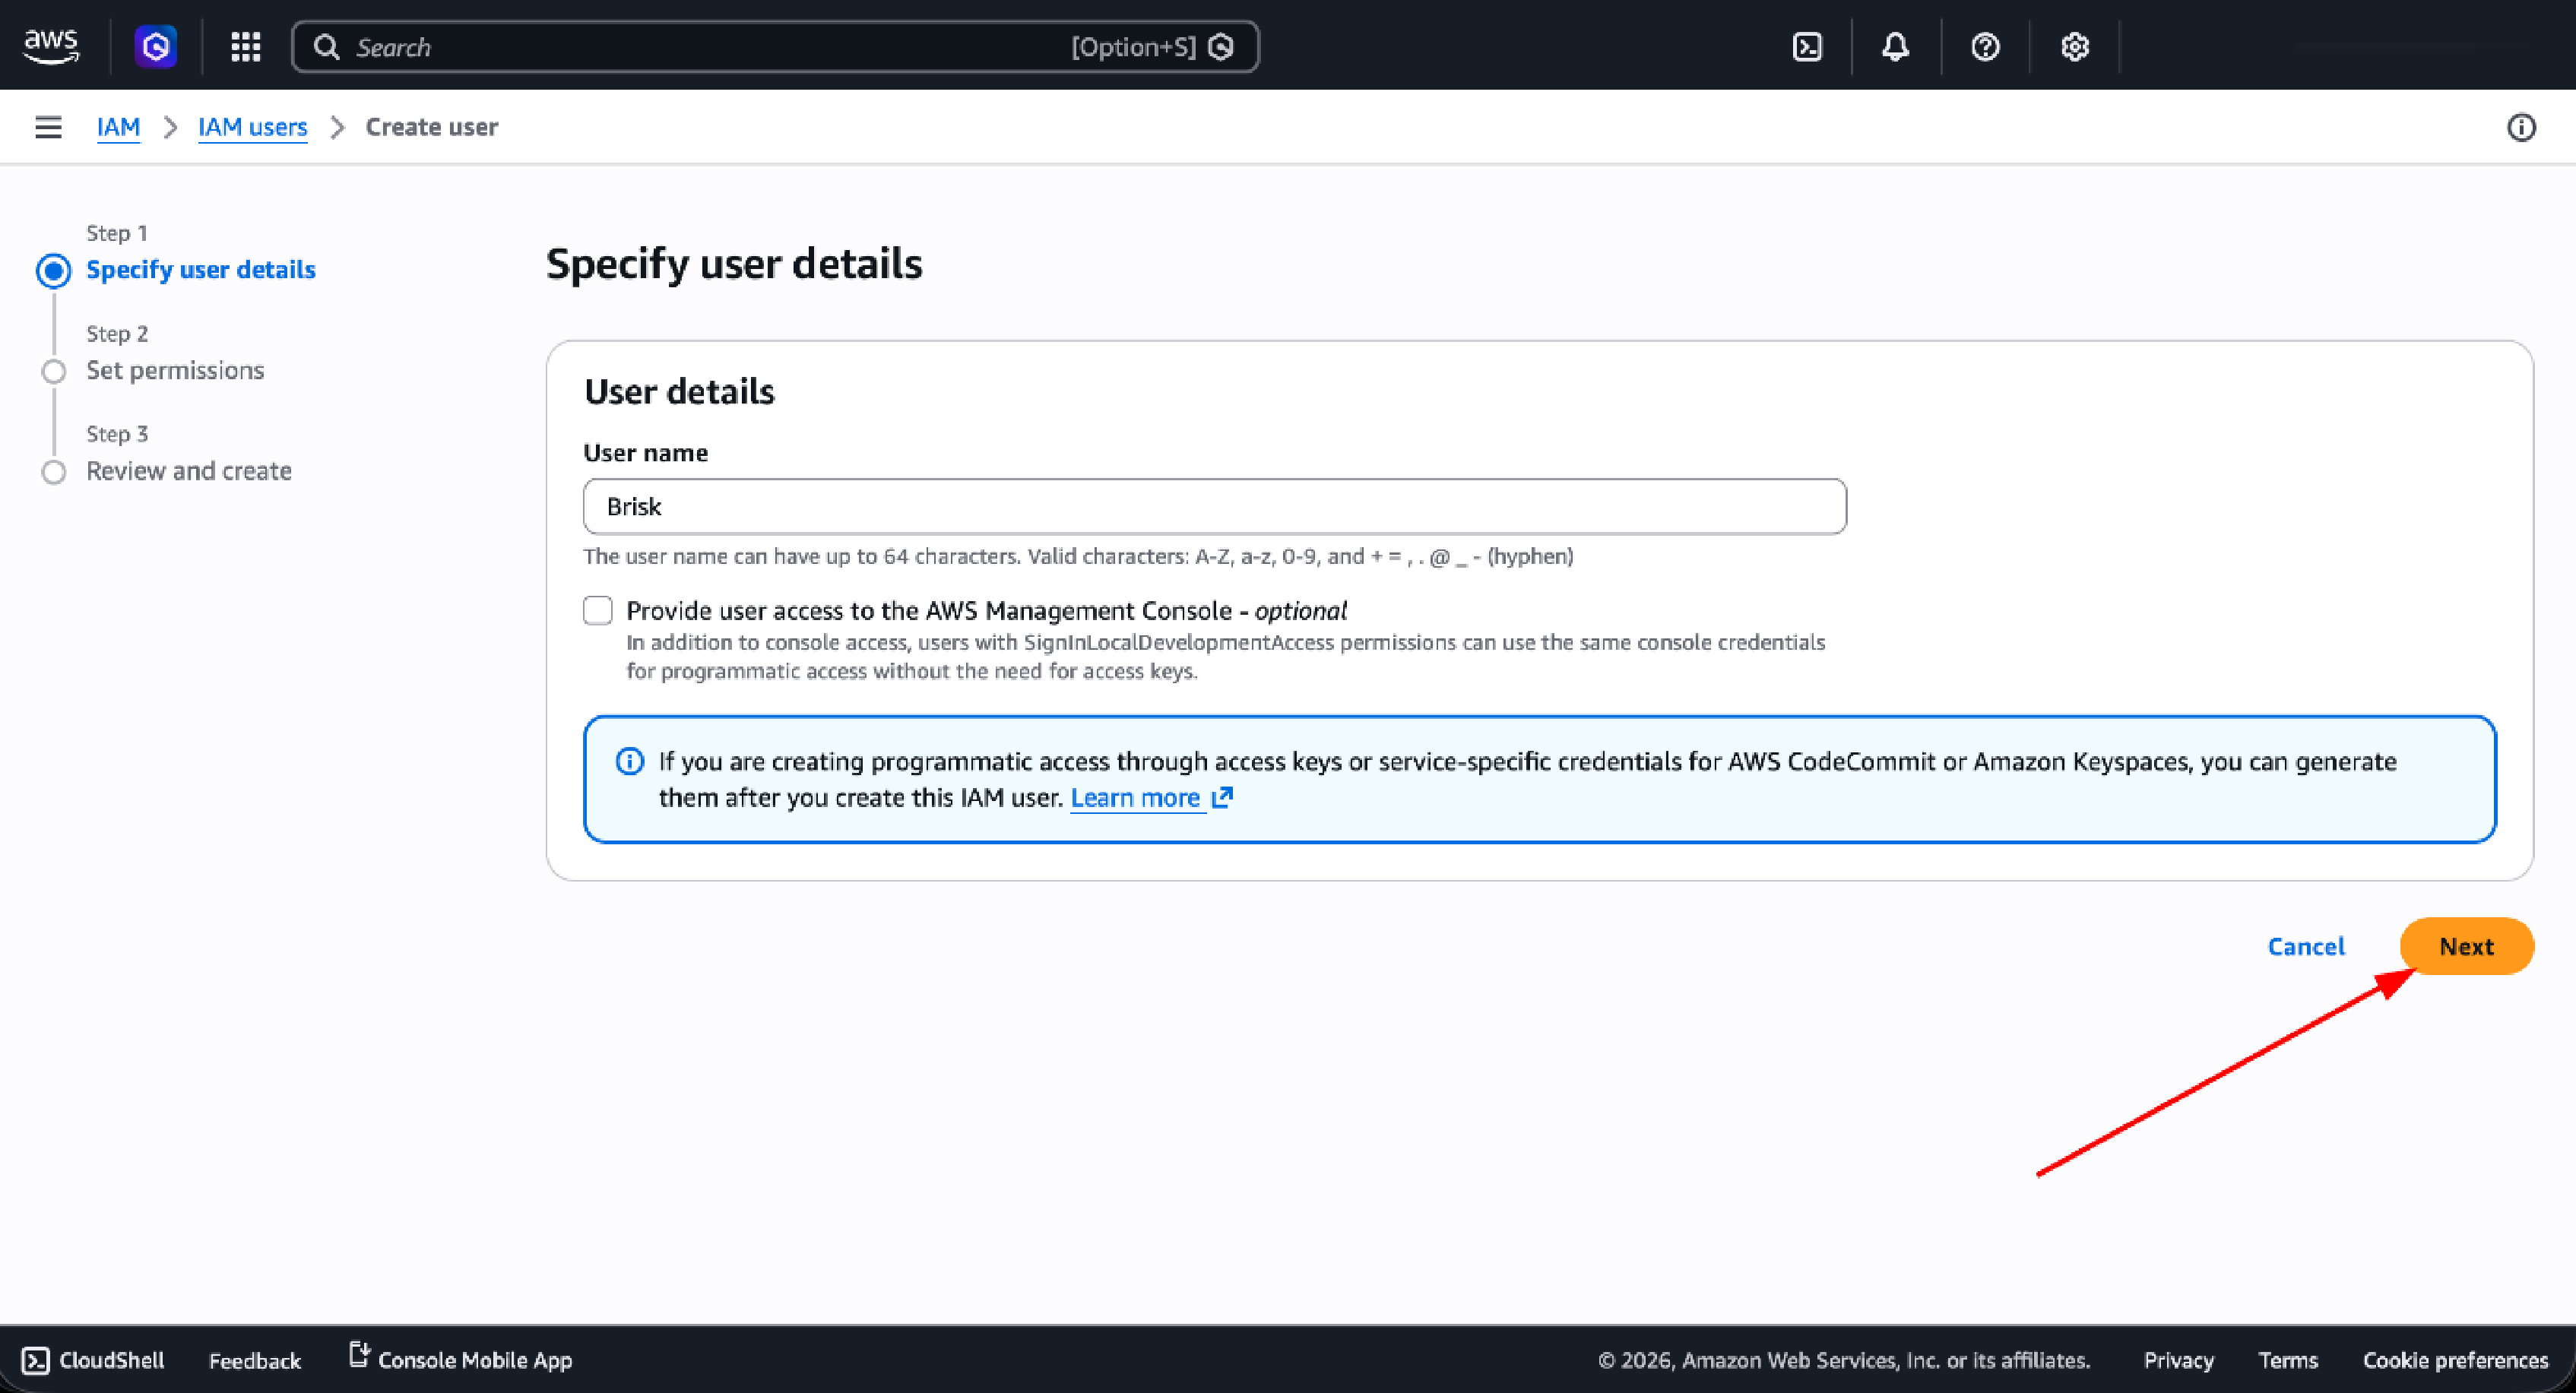
Step 4 — Configure User Details
Fill in the user details as follows:
| Field | Value |
| User name | Brisk |
Important: AWS Management Console access is optional.
Console access is unnecessary for an audit engagement. Programmatic access via access keys is sufficient and reduces the attack surface. Click Next to continue.
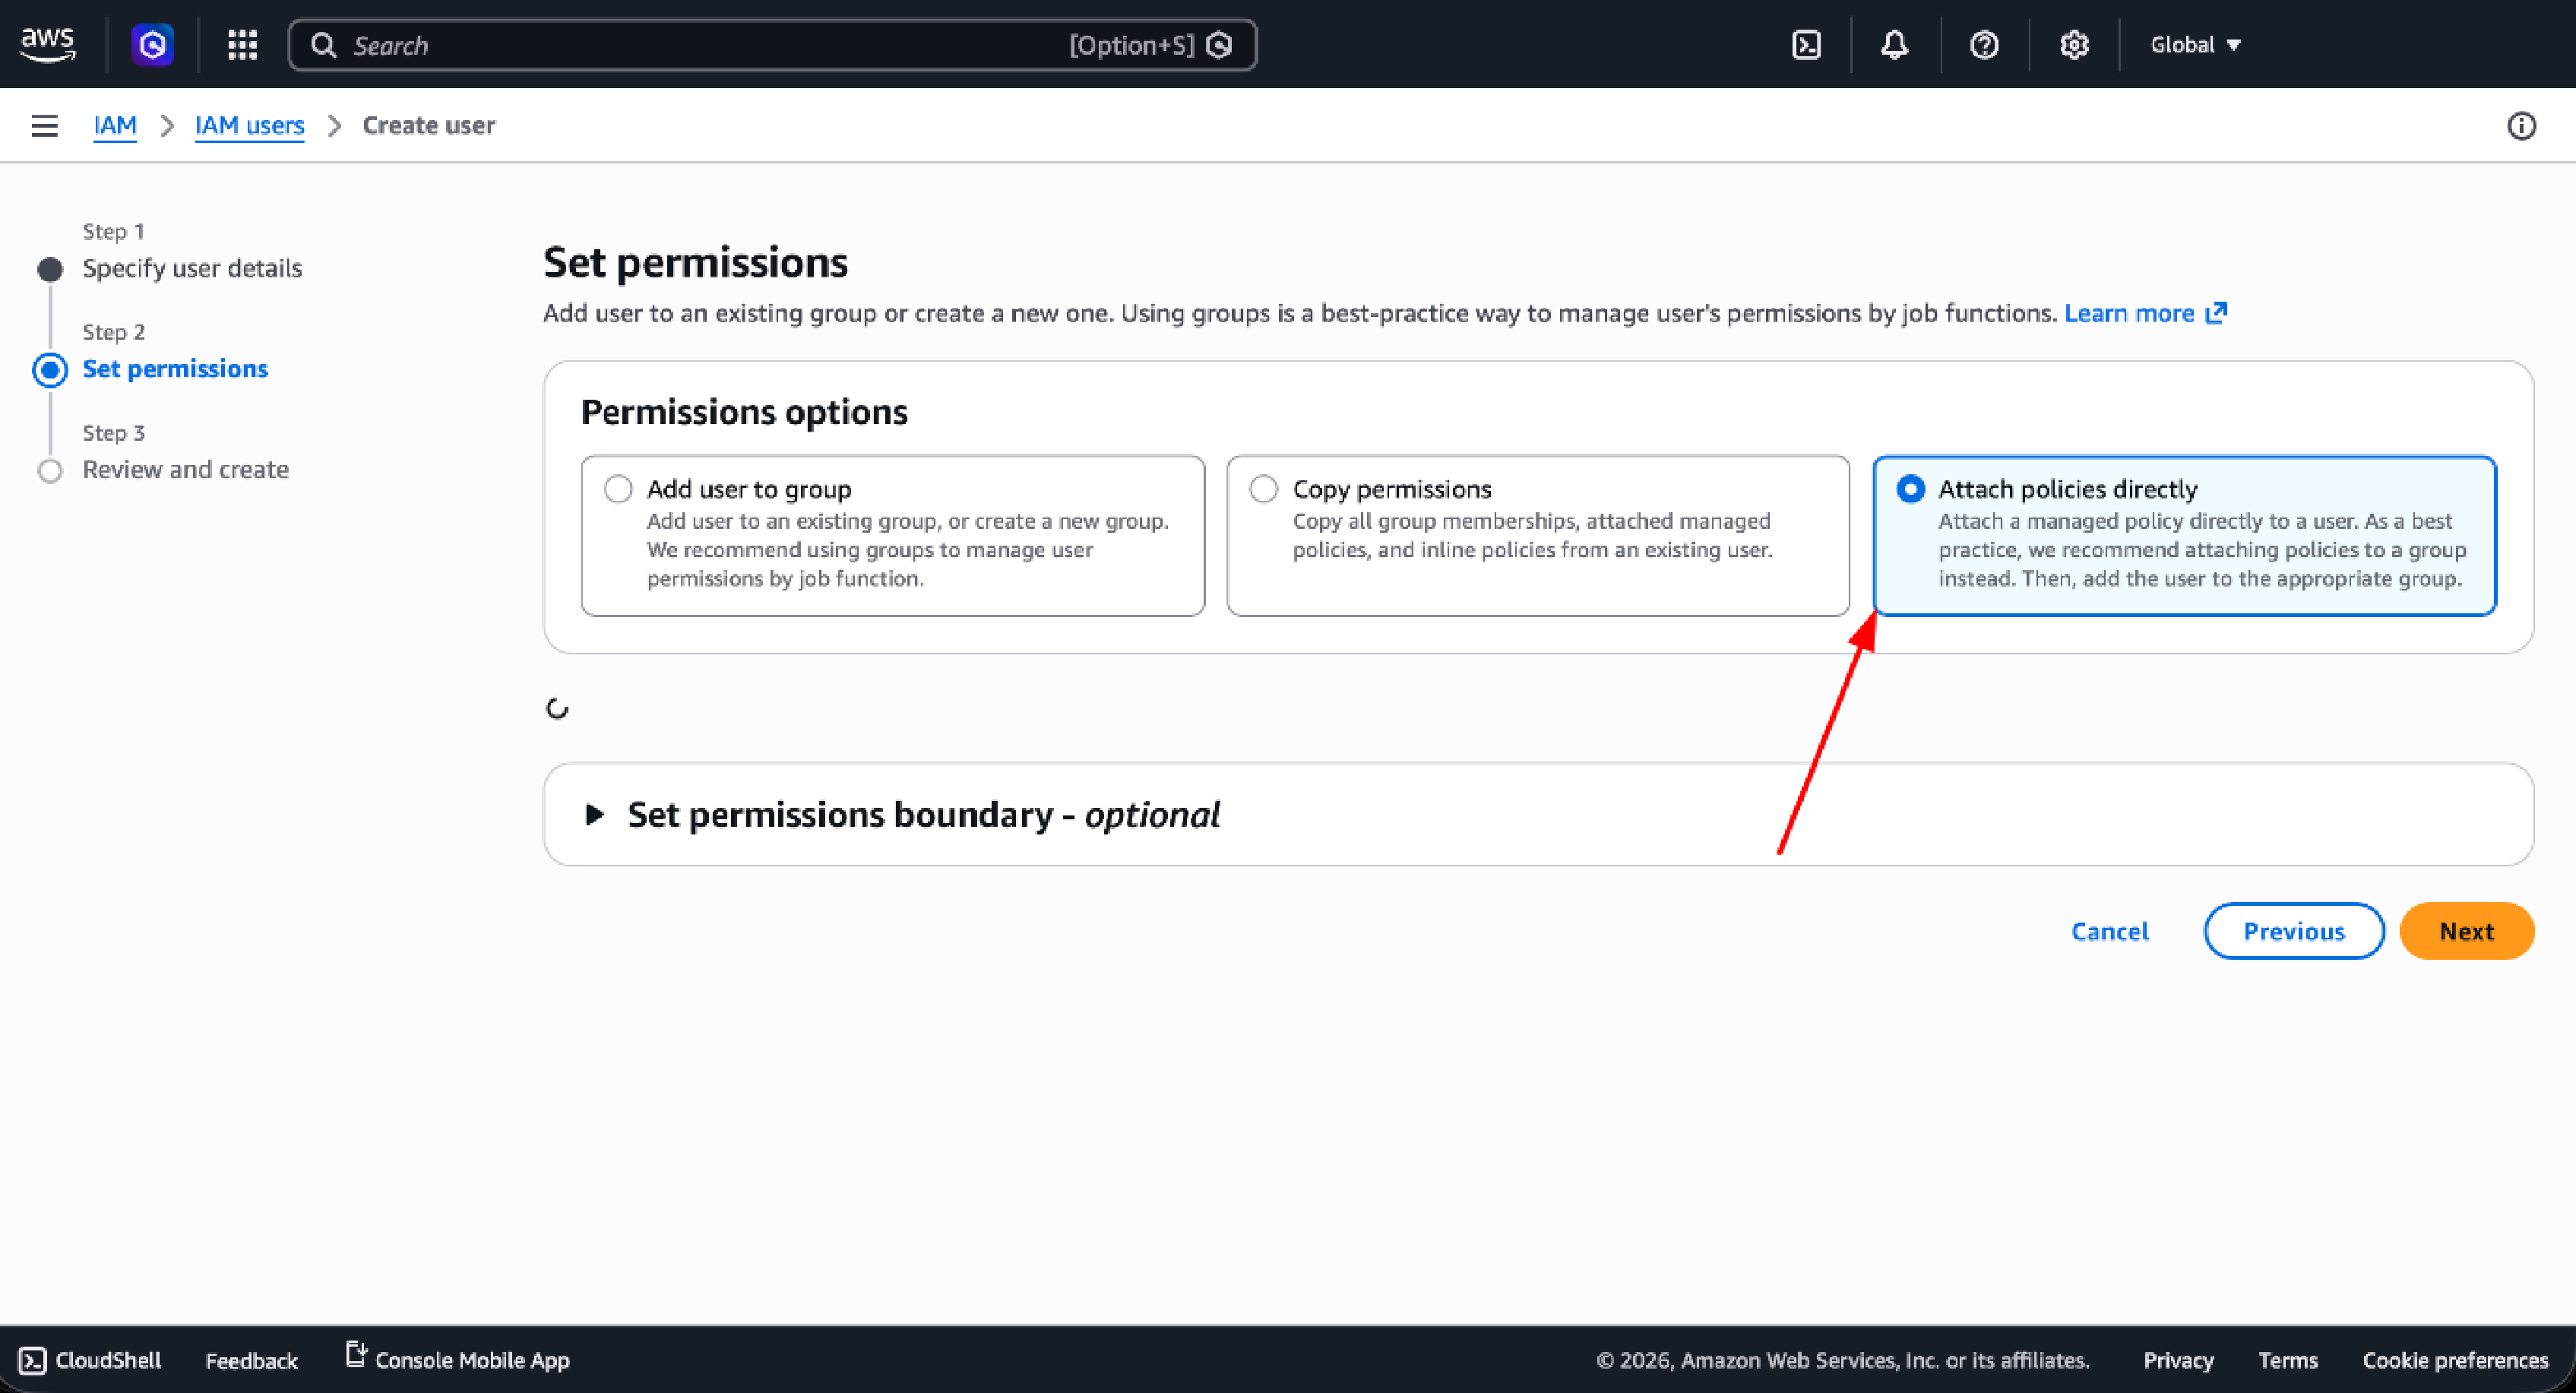
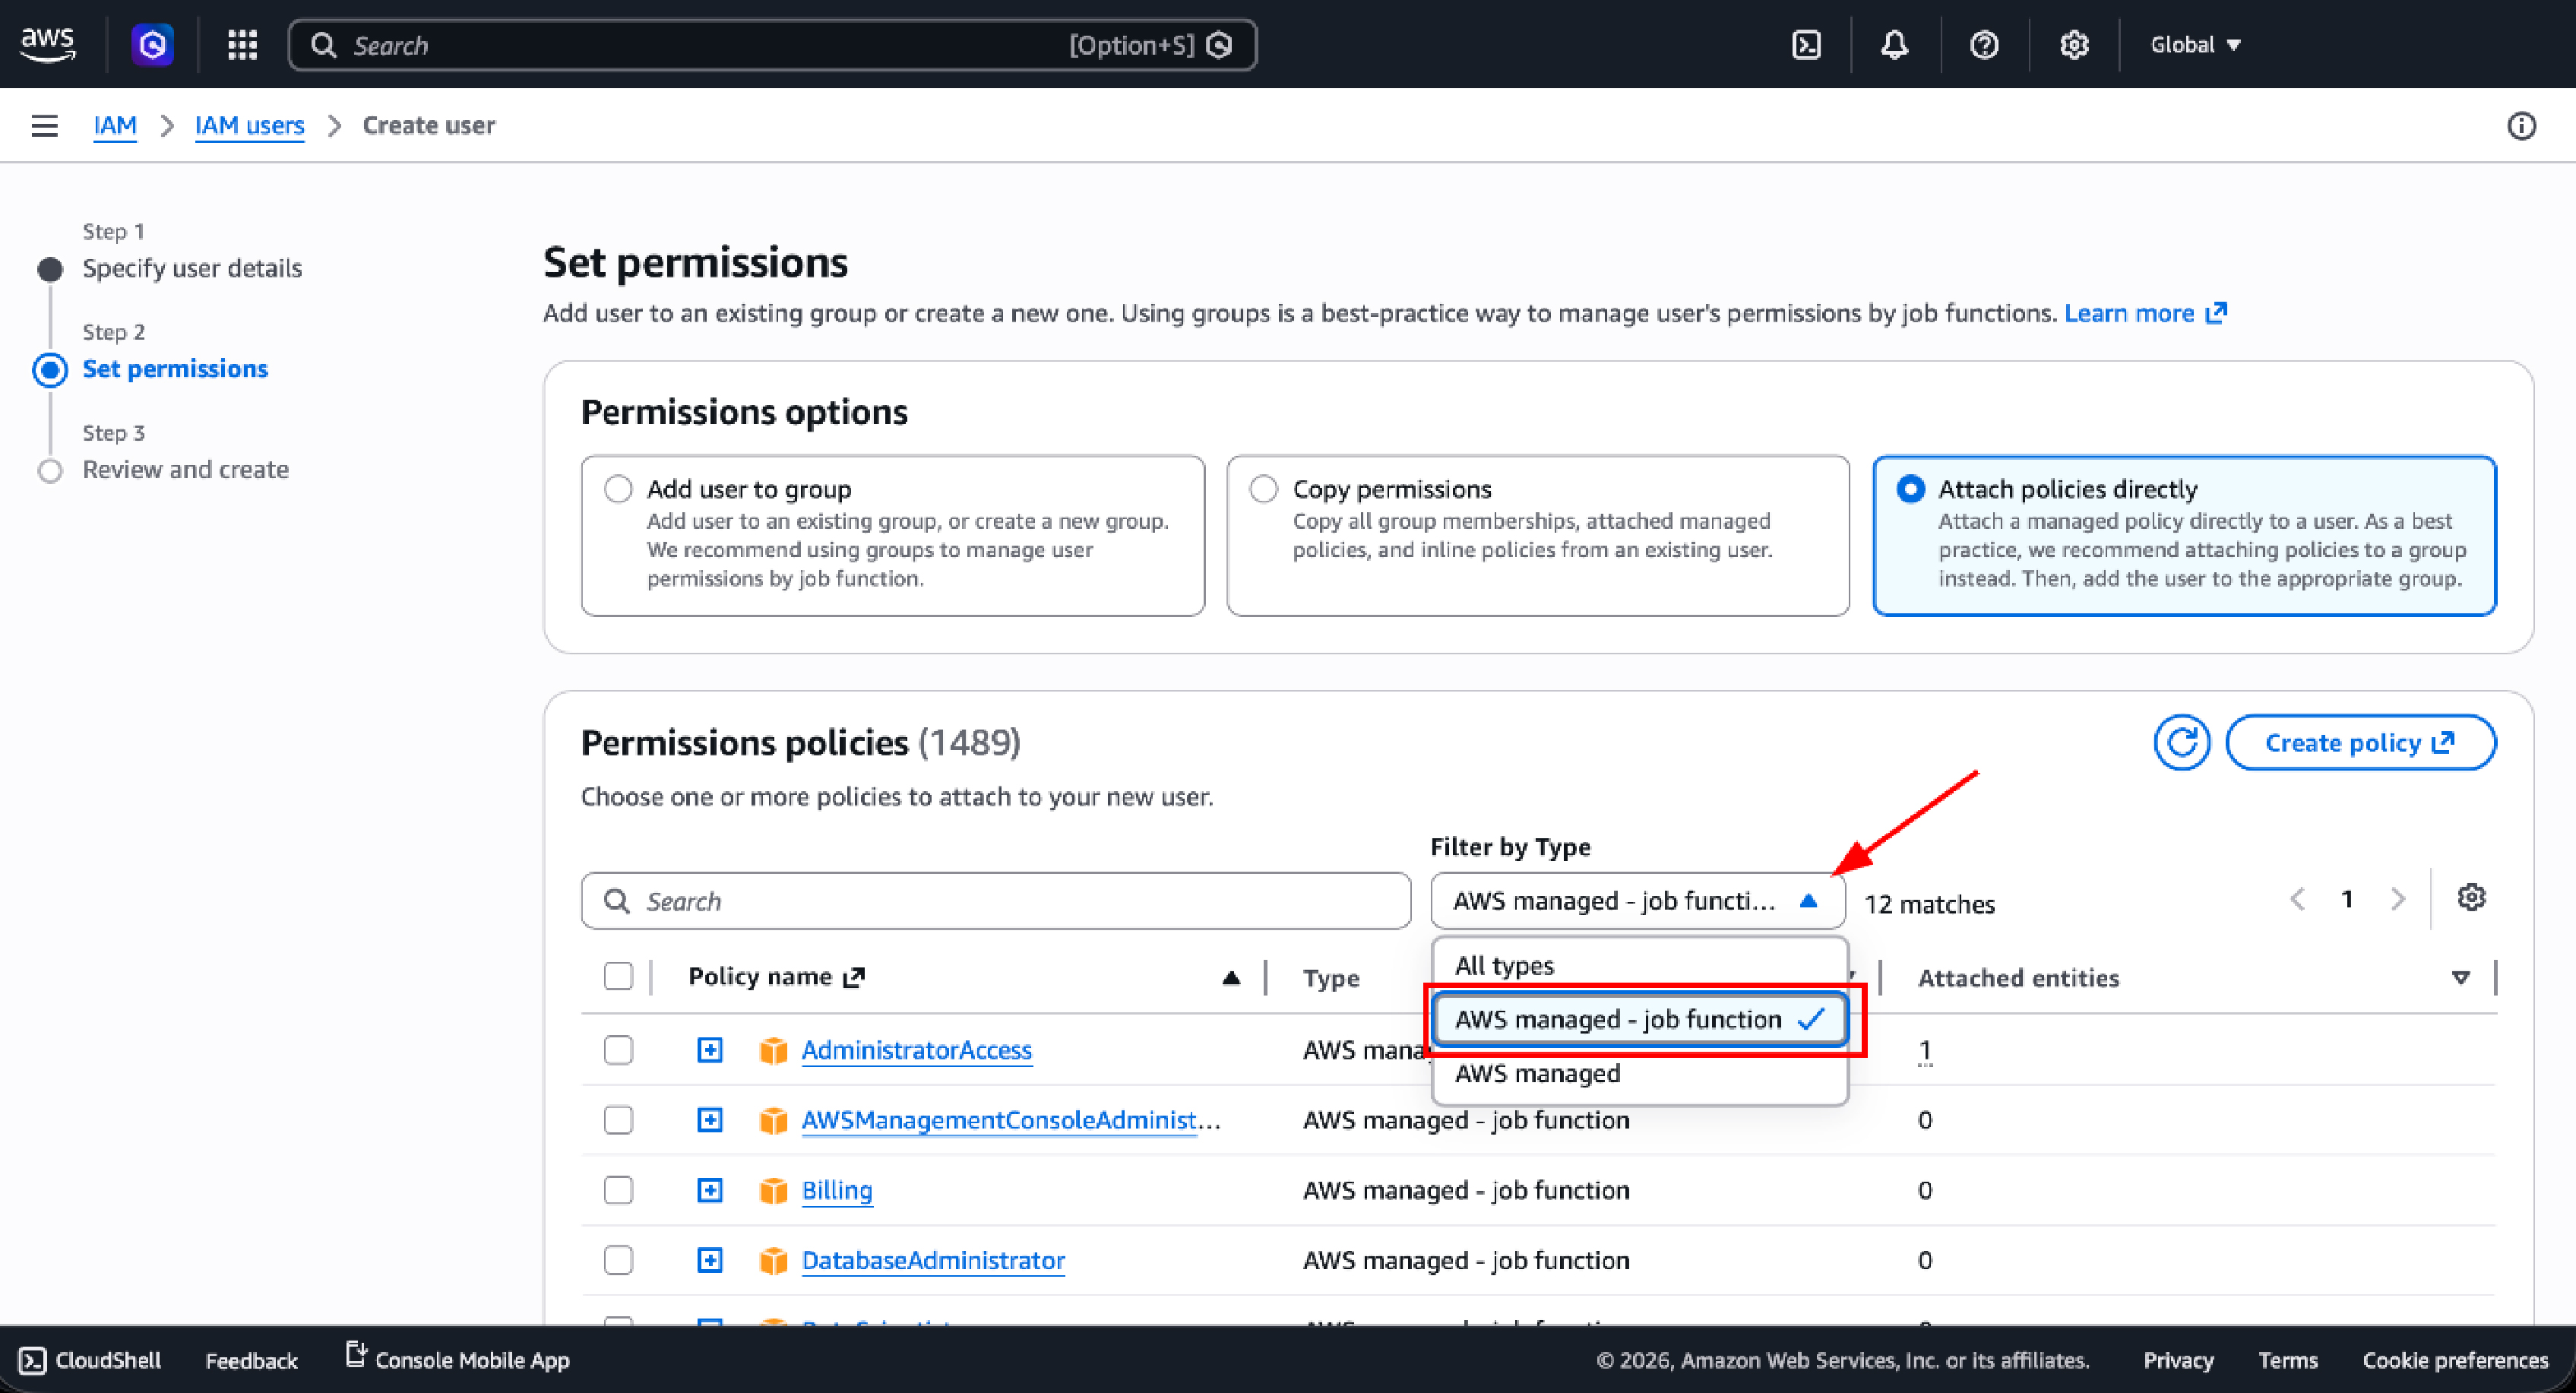
Step 5 — Set Permissions
On the permissions screen, select Attach policies directly. This method gives you direct control over which managed policies are assigned to the user, without relying on group inheritance.
Step 6 — Filter AWS Managed Policies
To narrow the policy list to relevant audit policies, use the filter dropdown. Under Filter by Type, select AWS managed job function. This surfaces job-function-aligned policies maintained by AWS, including both policies you need.
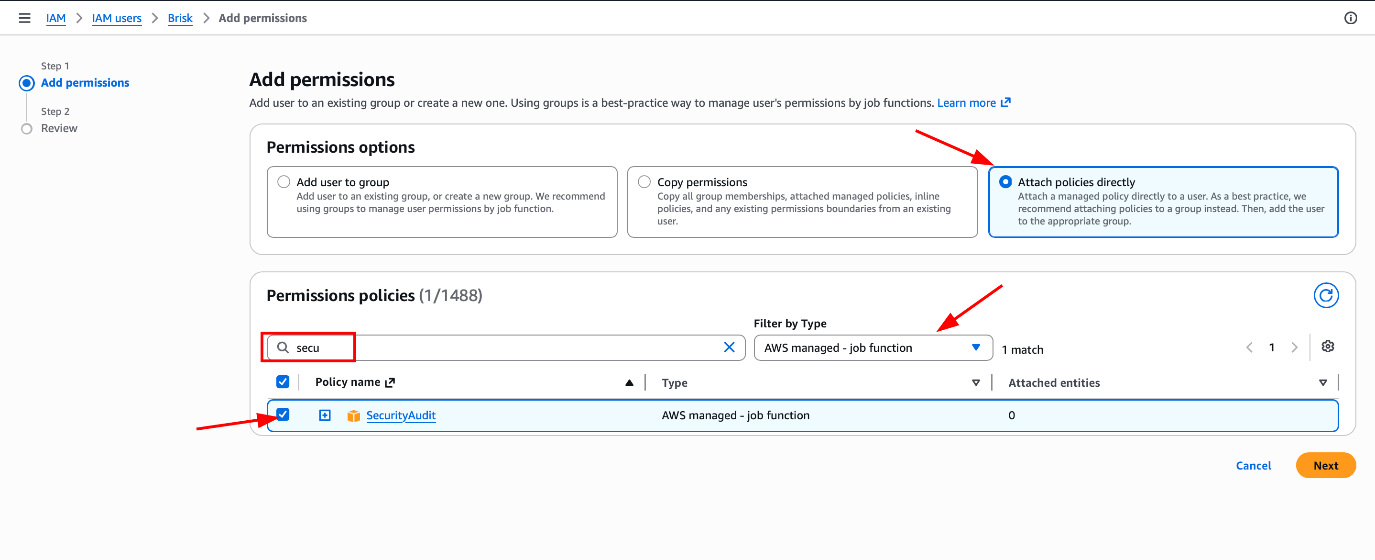
Step 7 — Attach Security Audit Policy
In the policy search box, type secu and locate SecurityAudit in the results. Check the box next to it. This policy grants security-focused visibility across IAM, CloudTrail, Config, GuardDuty, and related security services. Click Next.
Step 8 — Attach ReadOnlyAccess Policy
In the same policy search box, type read and check the box next to ReadOnlyAccess. This policy extends visibility to EC2 instances, VPC configurations, RDS databases, Lambda functions, S3 buckets, and much more, enabling our team to build a complete picture of your infrastructure posture.

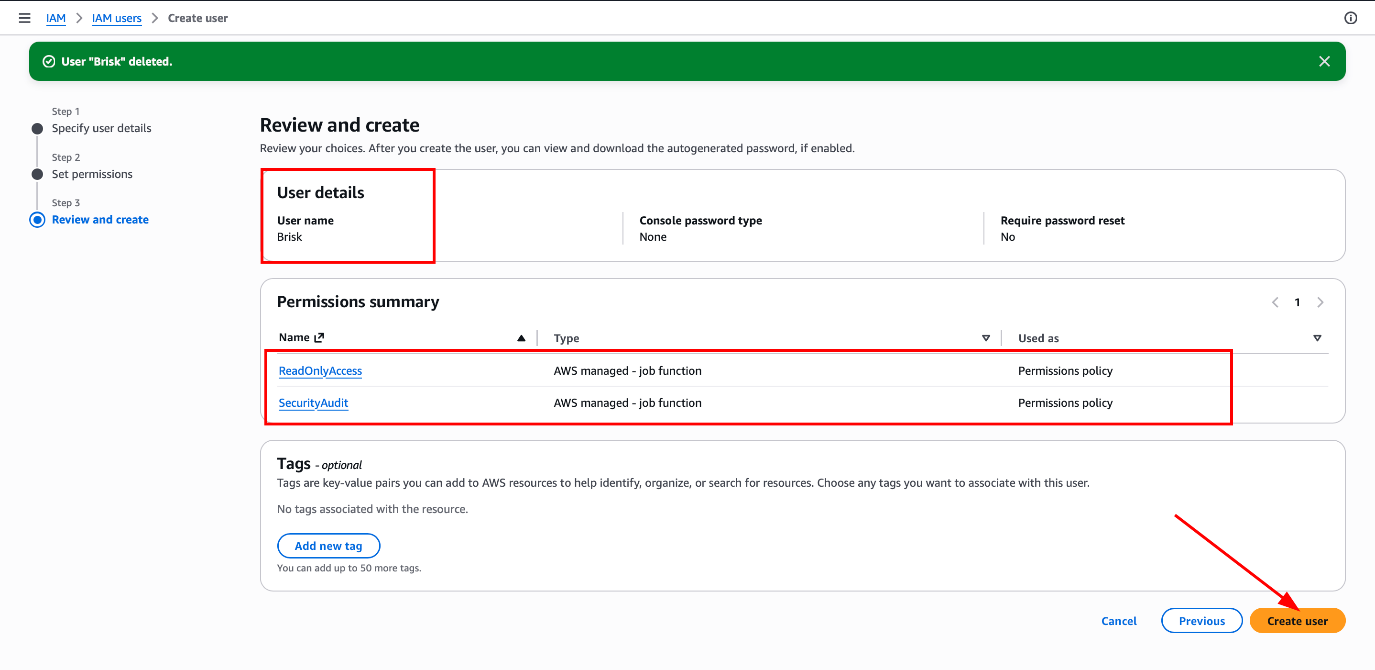
Step 9 — Review and Create User
Before finalizing, verify the configuration summary:
| Configuration | Value |
| Username | Brisk |
| Policies | SecurityAudit + ReadOnlyAccess |
| Console Access | Disabled |
Once confirmed, click Create user.
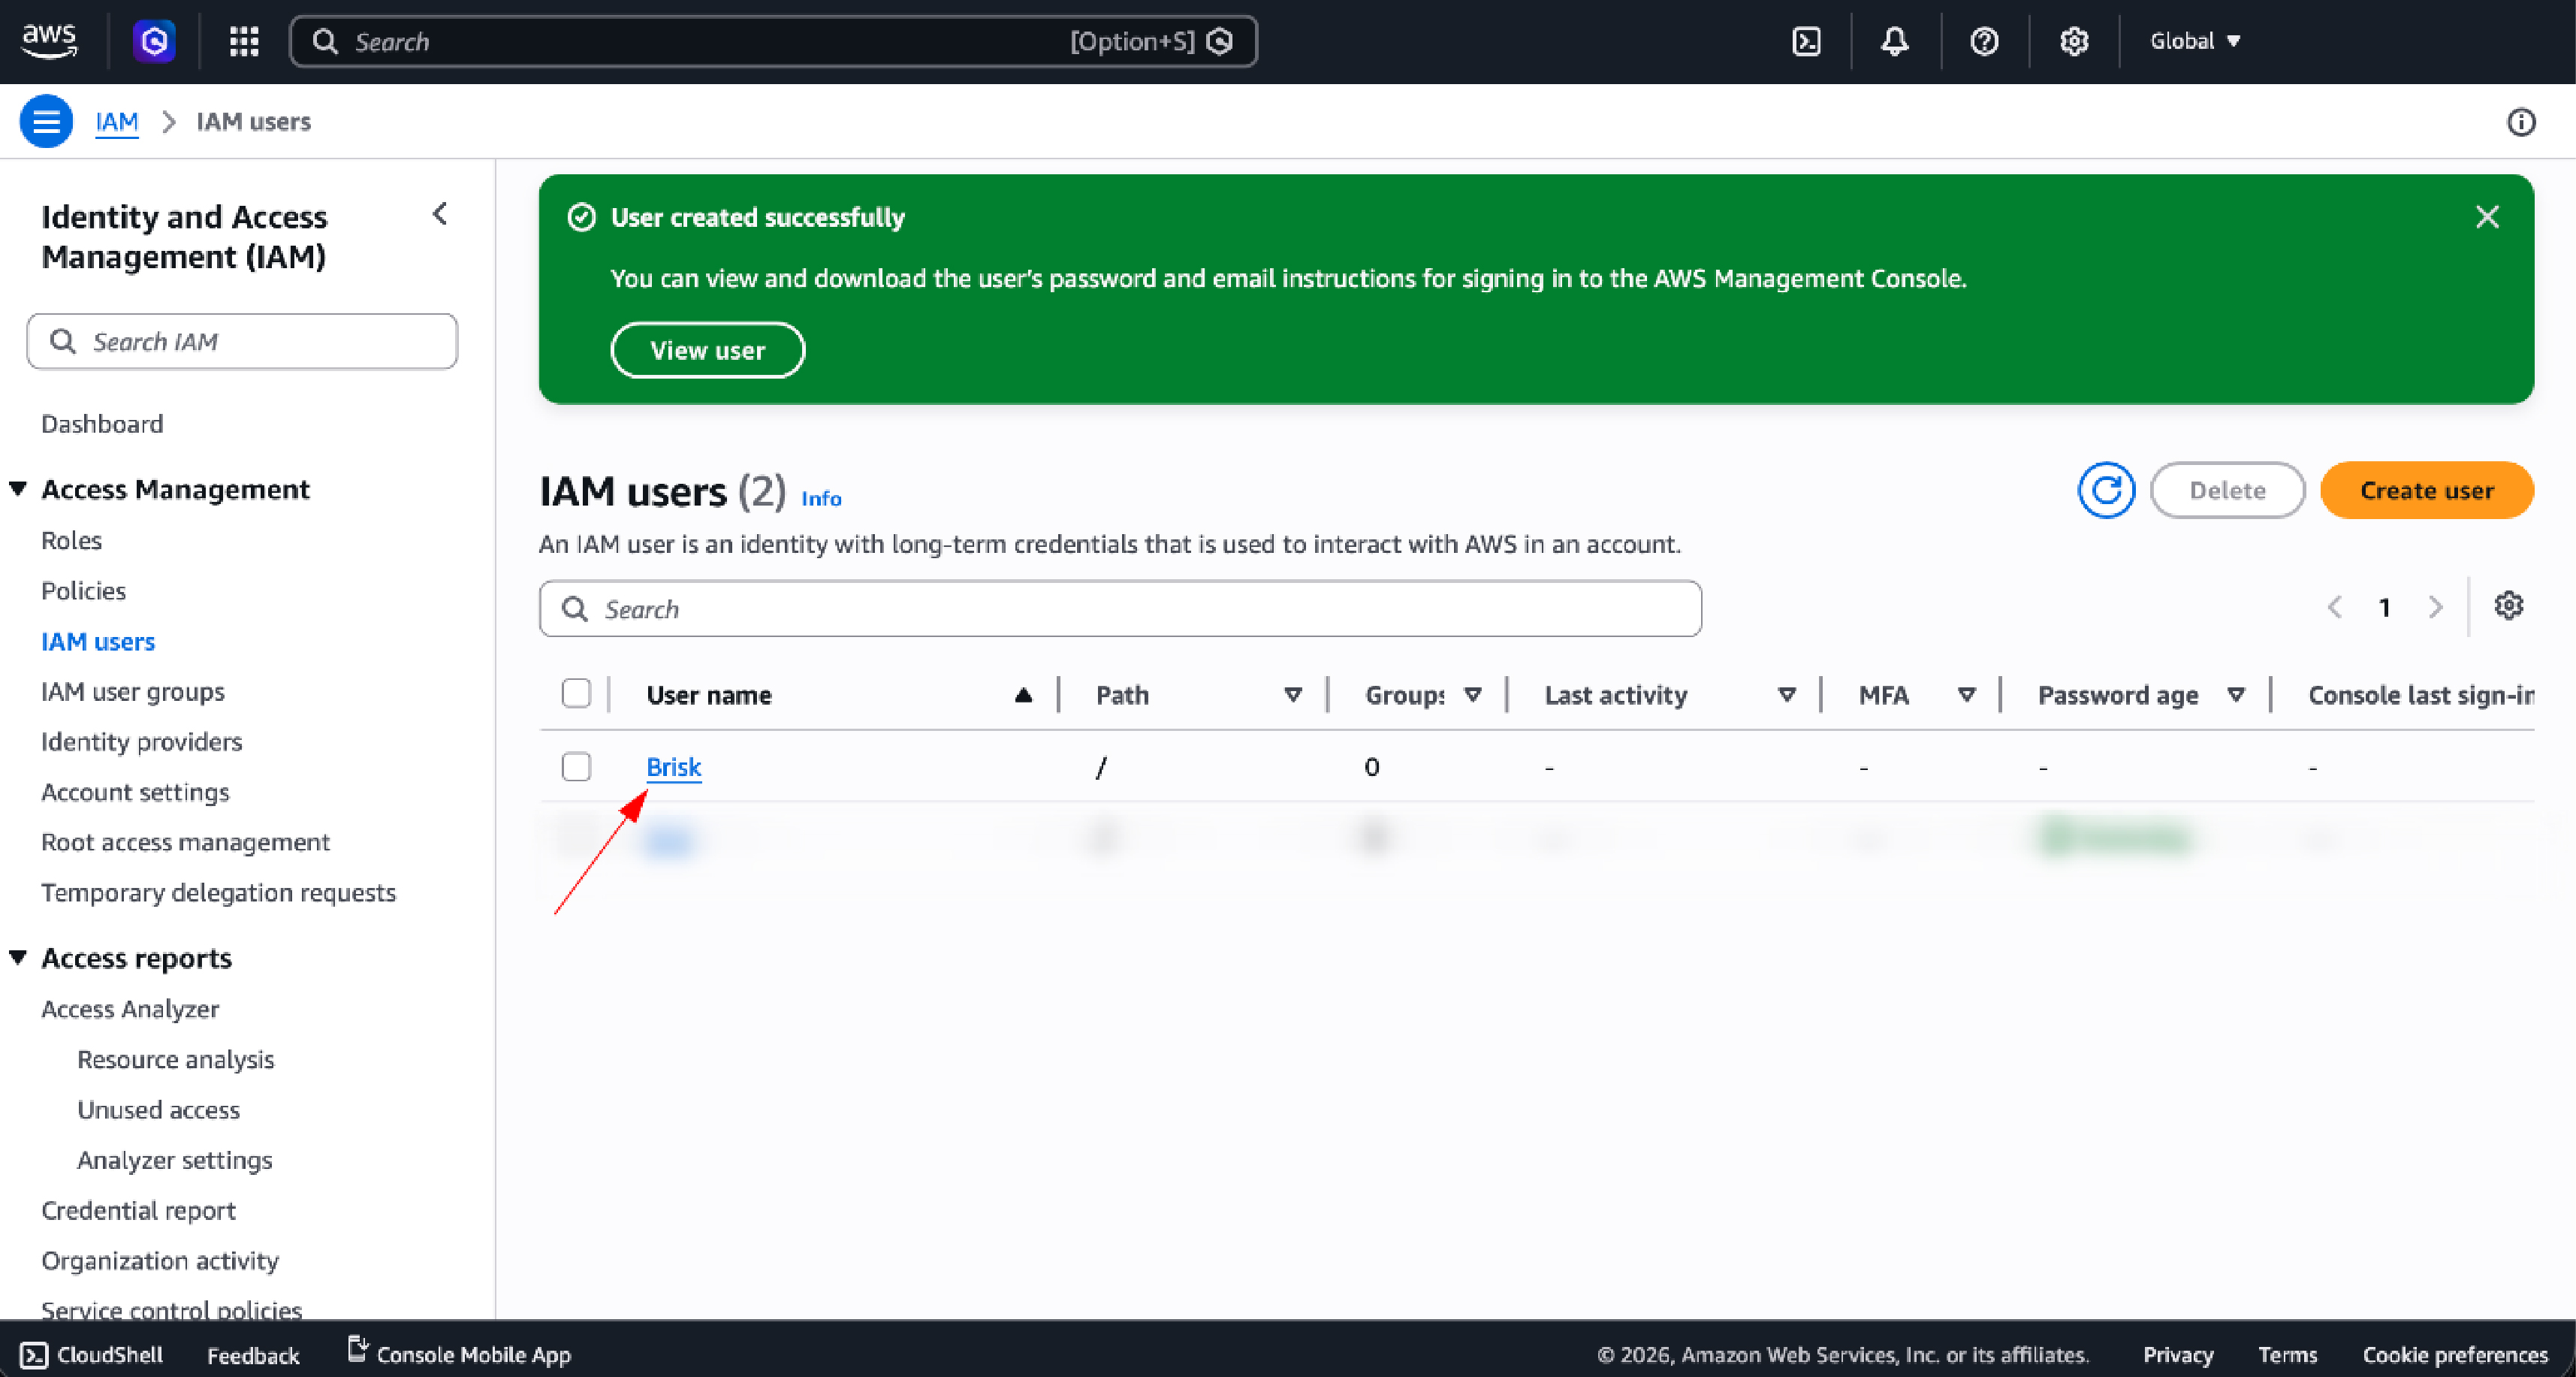
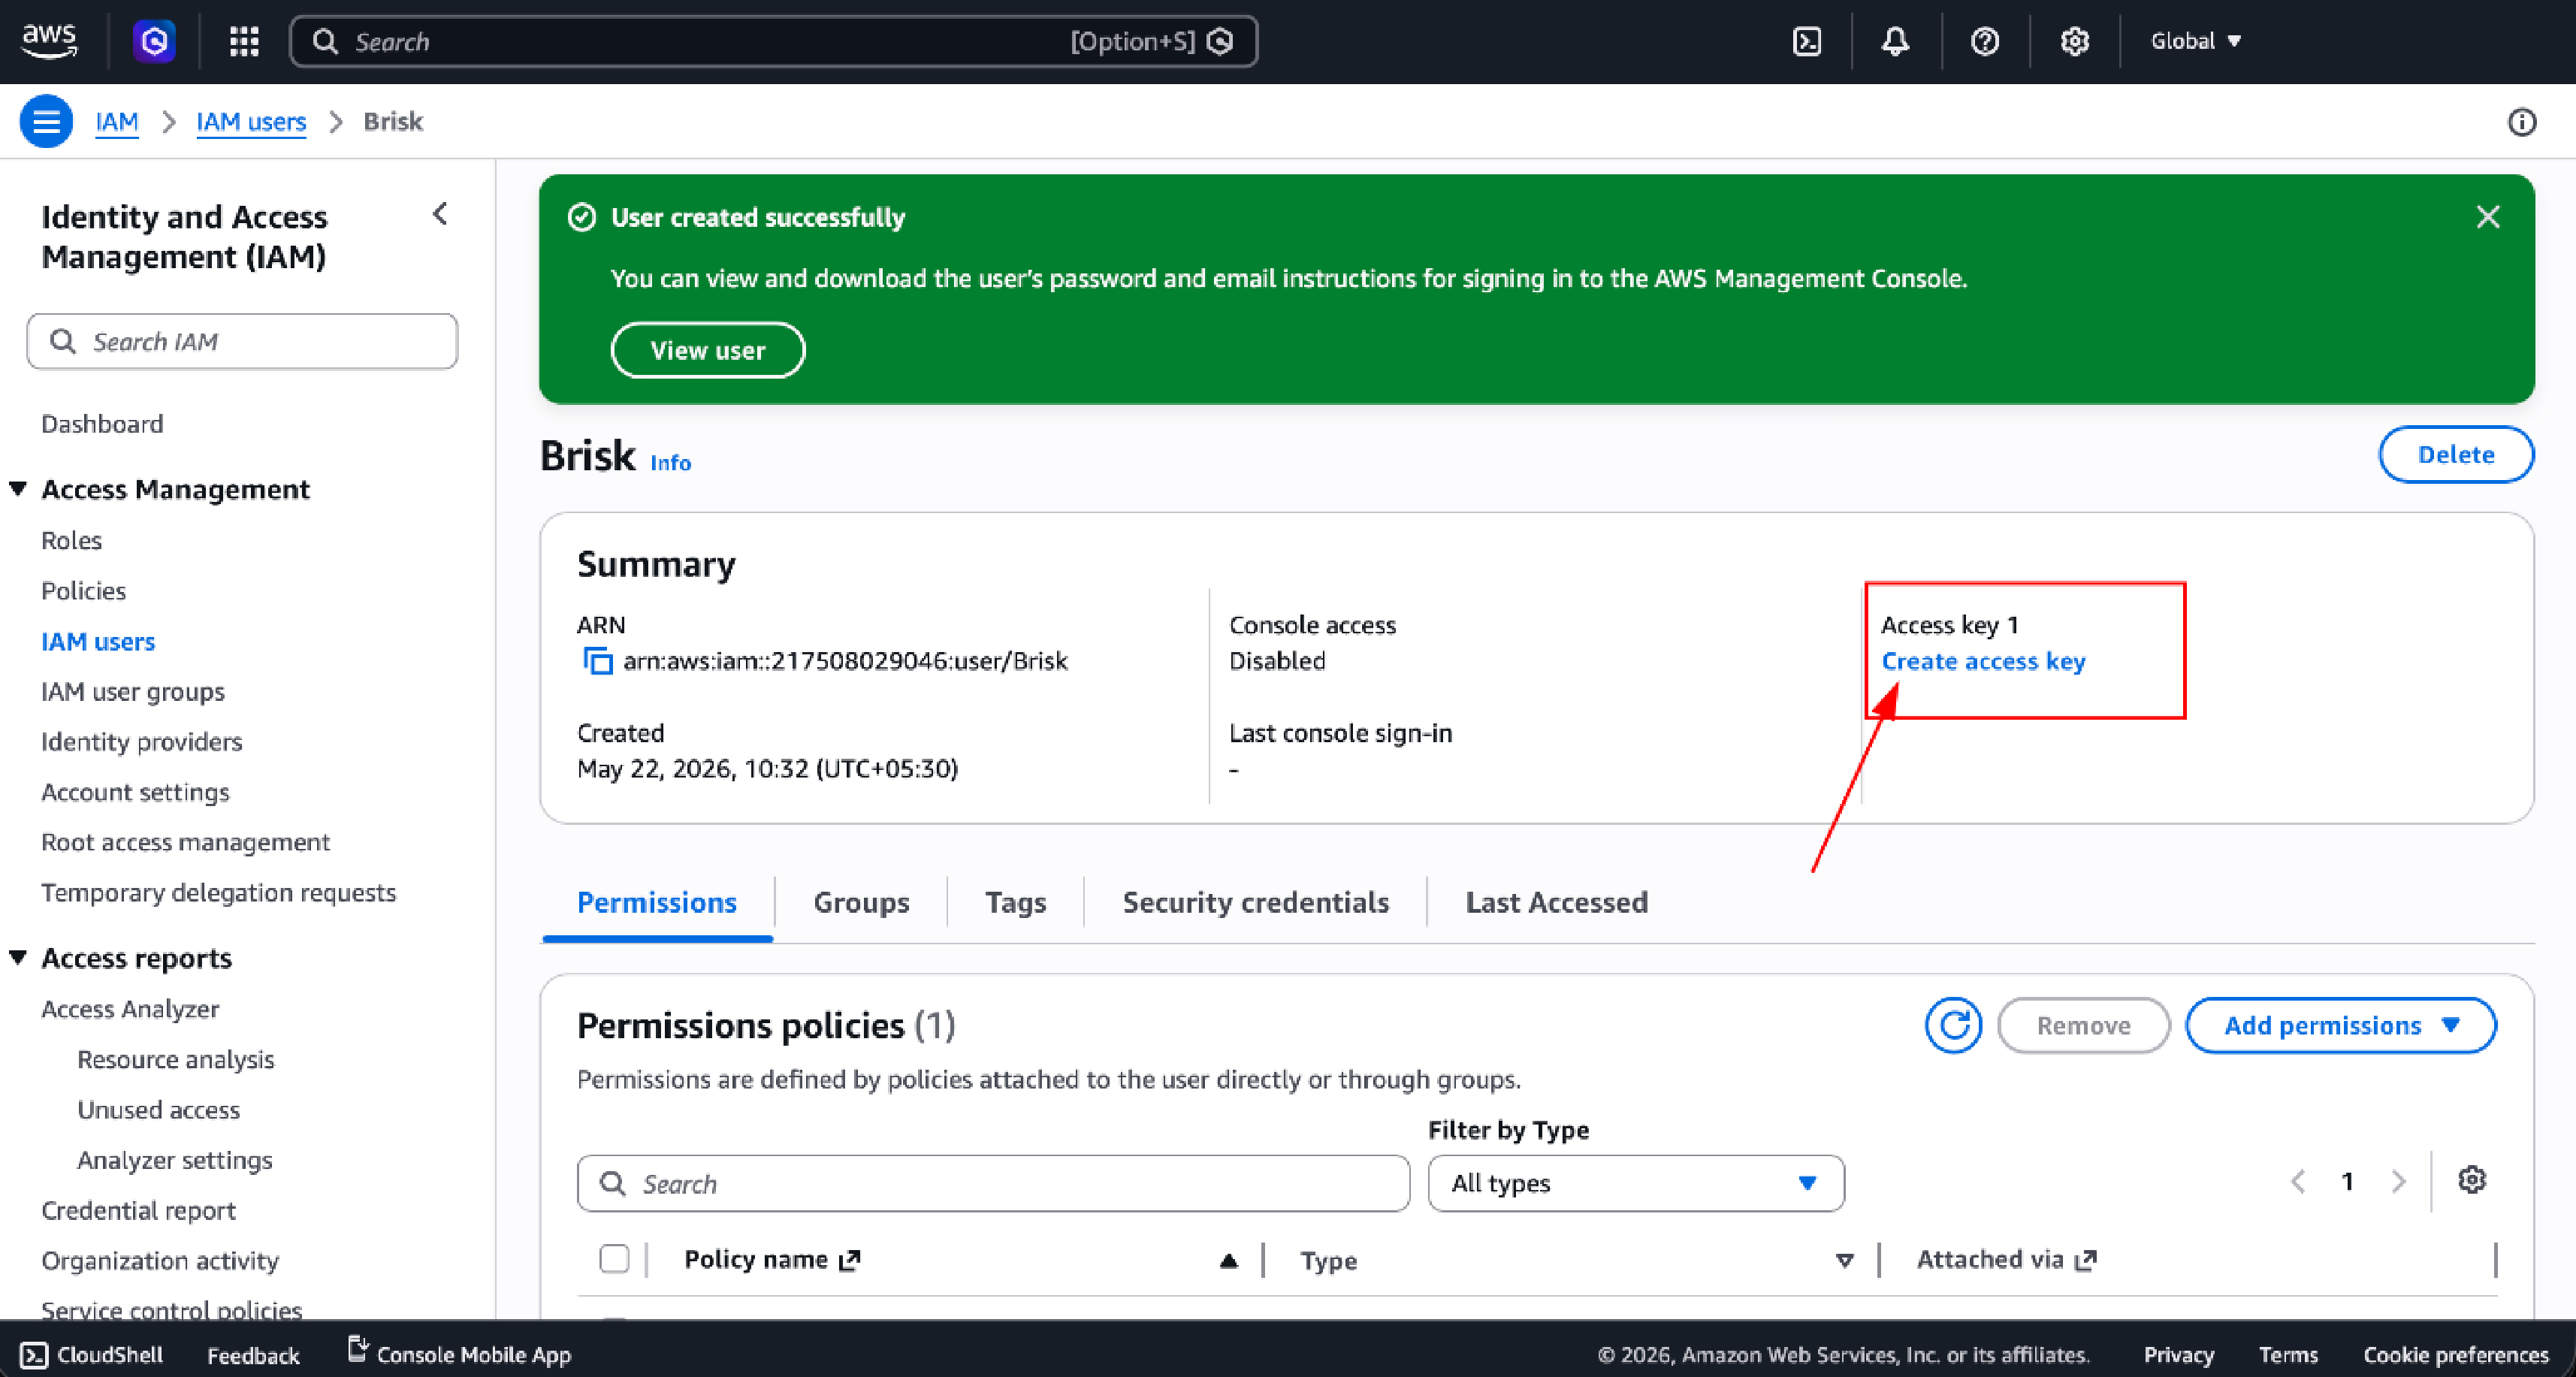
Step 10 — Open the Newly Created User
After the success confirmation, click the username Brisk. This opens the user detail page where you can manage credentials and review attached policies.
Step 11 — Initiate Access Key Creation
On the user detail page, click Create access key. Access keys allow programmatic interaction with AWS APIs, which is the mechanism Briskinfosec uses to run audit tooling against your environment.
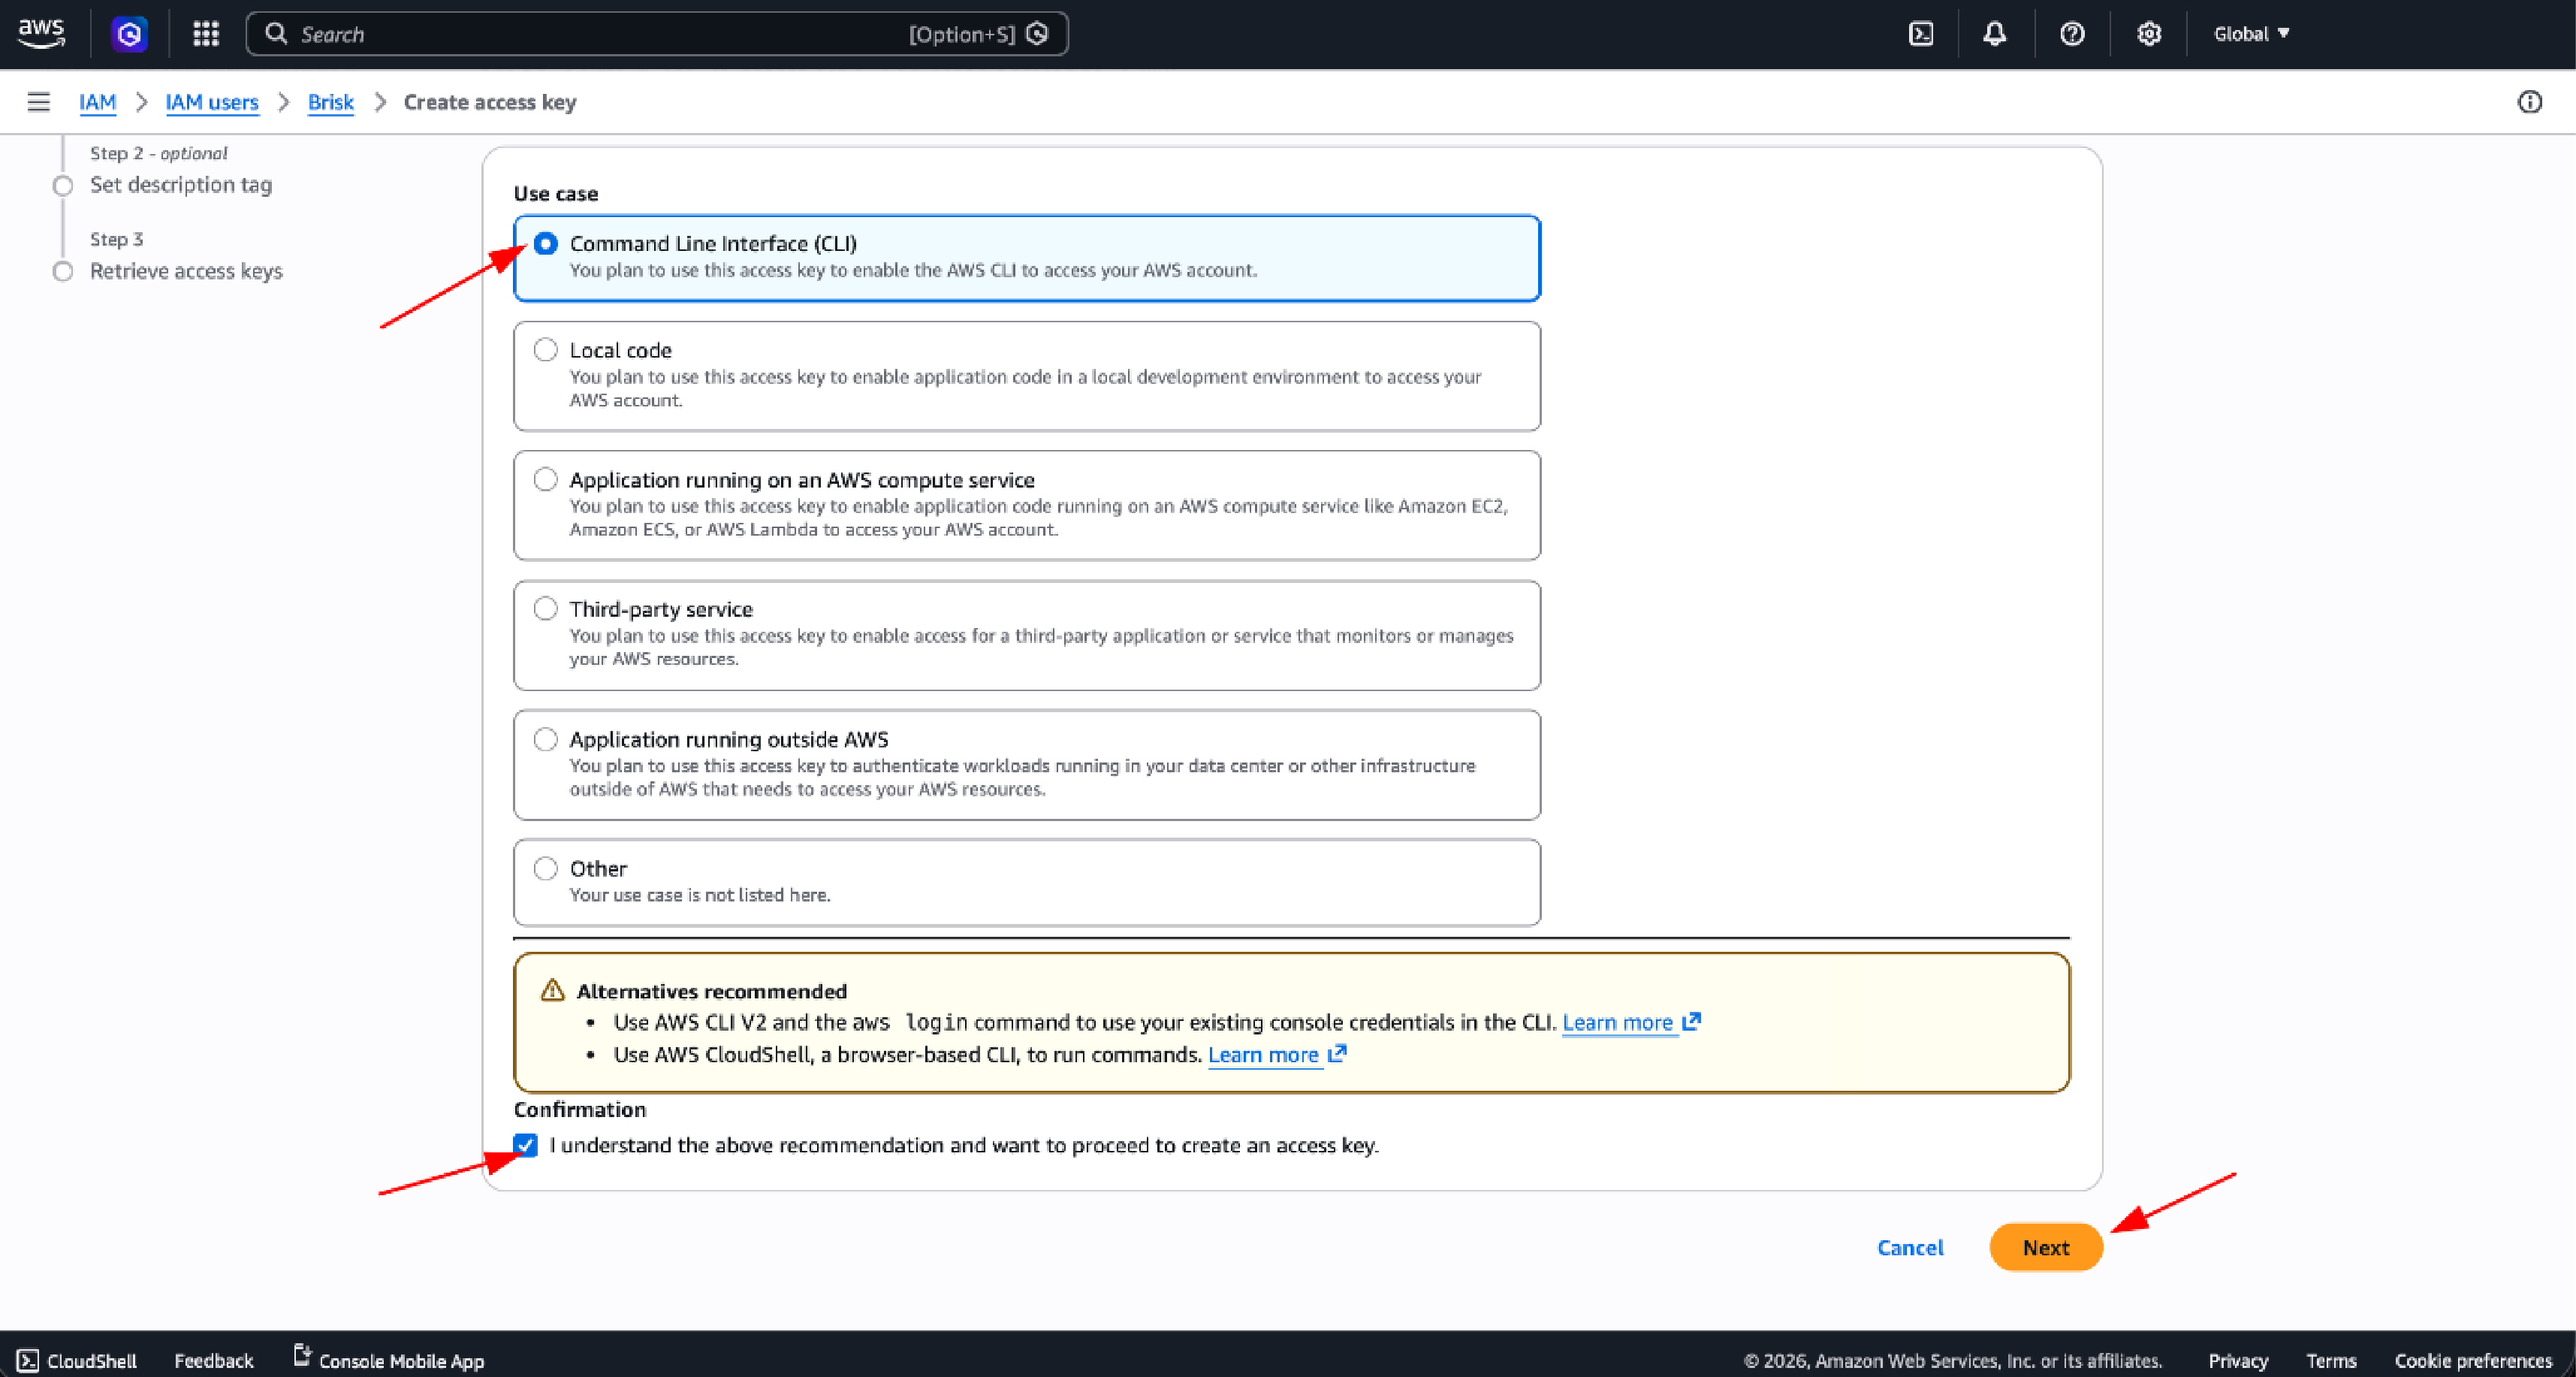
Step 12 — Select the CLI Use Case
AWS will prompt you to select a use case. Choose Command Line Interface (CLI), then check the acknowledgment box confirming you understand the recommendation and want to proceed. Click Next.
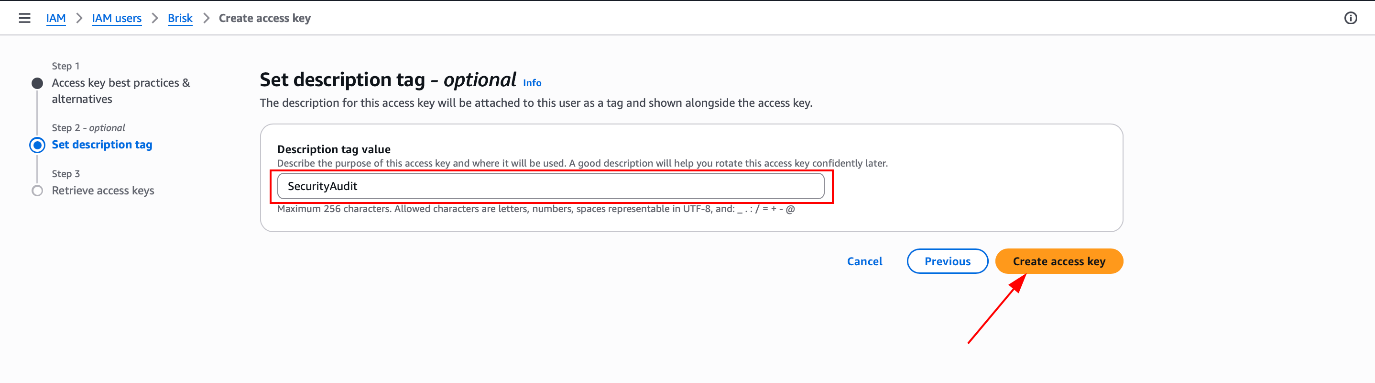
Step 13 — Add Description Tag
Adding a description tag helps you identify this key's purpose in future CloudTrail logs and IAM reviews.
| Field | Value |
| Description tag | SecurityAudit |
Click Create access key to generate the credential pair.
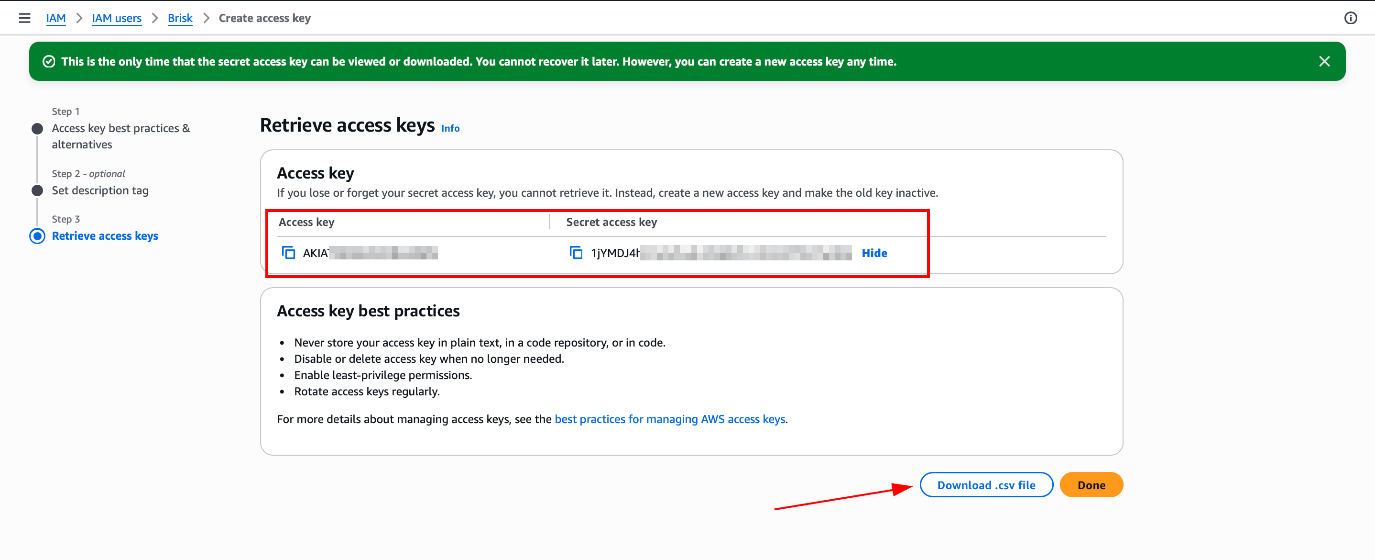
Step 14 — Download and Securely Store Access Keys
AWS will display your Access Key ID and Secret Access Key one final time.
Critical: The Secret Access Key is shown only once and cannot be retrieved later. Download the .csv file immediately and store it in a secure, encrypted location before closing this page.
Share the downloaded .csv file with the Briskinfosec team via an encrypted channel only.
Post-Audit Cleanup
Once Briskinfosec delivers the final assessment report, revoke all access immediately. Leaving dormant audit credentials in place, even read-only ones, unnecessarily extends your attack surface.
1. Disable or delete the access keys from the IAM user page.
2. Delete the IAM user Brisk entirely from the console.
3. Confirm both attached policies, SecurityAudit and ReadOnlyAccess, are removed.
4. Archive the relevant CloudTrail logs for the audit period as compliance evidence.
5. Review the CloudTrail activity log for the audit user to confirm all access was within the agreed scope.
Why This Approach Follows Industry Best Practices
The IAM audit user setup described in this guide is not a workaround. It is the enterprise-standard method for granting controlled external access to cloud environments. It directly implements the following principles:
1. AWS Security Best Practices: specifically, the recommendation to use least-privilege, purpose-scoped IAM users for third-party access.
2. Principle of Least Privilege: the user has exactly the permissions required for the task and nothing beyond that.
3. Enterprise Audit Standards: consistent with how SOC 2 assessors, PCI QSAs, and cloud security auditors operate globally.
Secure External Auditor Access Models: a clean separation between the auditor credential and internal operational accounts ensures no privilege bleed-over.
Conclusion
Cloud security assessments are only as reliable as the access model that supports them. By creating a dedicated, least-privilege IAM audit user, you protect your environment, preserve audit integrity, and maintain full control throughout the engagement.
This process takes less than 10 minutes to complete. At the end of the engagement, a single action removes all access permanently. Adopting this model as a standard operating procedure will meaningfully reduce your third-party access risk over the long term.
Frequently Asked Questions
1. Will Briskinfosec be able to modify or delete any of our resources?
No. Both SecurityAudit and ReadOnlyAccess are strictly read-only policies. They do not permit any create, update, delete, or configuration-change operations. Your production environment is completely safe during the engagement.
2. Do we need to share our root account credentials?
Absolutely not. Root credentials should never be shared with any third party under any circumstances. The dedicated IAM user approach described in this guide is precisely the right alternative and is what AWS recommends for all external audit engagements.
3. Can we revoke access at any time during the audit?
Yes, immediately. You can disable the access keys, delete the IAM user, or remove the attached policies at any point from the AWS Console. Access is revoked within seconds of any of these actions.
4. How long should we retain the CloudTrail logs from the audit period?
Retention requirements vary by compliance framework. SOC 2 and ISO 27001 typically require at least one year. PCI DSS mandates 12 months with the most recent 3 months immediately available. When in doubt, retain for a minimum of 12 months and consult your compliance team for framework-specific guidance.
5. What if we suspect the access keys were compromised?
Disable the access keys immediately from the IAM console as this takes effect within seconds. Then notify the Briskinfosec engagement lead, review CloudTrail for any unexpected activity, and generate a new key pair if the audit must continue. Do not delete the old key until you have reviewed its full usage history.
6. Will this setup leave any persistent changes in our account?
No lasting changes result from attaching read-only policies to a temporary user. After post-audit cleanup, your account returns to exactly the state it was in before the engagement began.